Eagle Cad Lecture series
Written by Charles Banuelos MFG DM
Table of Contents
Written 11/2/2017
The division has finished learning Eagle Cad. The first of the two tutorials covered moving of components in eagle cad along with switching to the PCB layout so that they may start to build. The second tutorial covered how to create traces and nets on the PCB. The lecture then covered what vias are and how to place them. The lecture followed with showing how that the use of both sides of the board which will make the designs of the PCB easier to come up with. The lecture then went into how to use polygons. The part of the lecture that teaches polygons might be the most important of the whole lecture. The polygon function allows for the creation of power planes and ground planes. These planes can be a small square in the corner of the board or it can take up the whole board. The lecture continues with how to do DRC checks. The lecture then goes over how to get the .dru files from OSH park in order to use their checks so that the boards can be built. The lecture concludes with making the Gerber files. The lecture shows how to download OSH parks gerber file presets. This allows for all of the Division members to turn in the correct files to make their PCB’s.
Update 11/30/2017
The lectures below along with the quiz and supplemental material provided will be able to teach students how to create PCBs given they are already given the schematics.
EagleCad Training Part 1
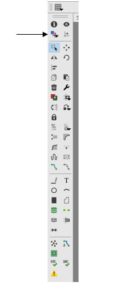
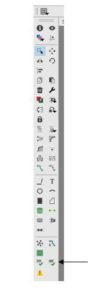
-To start a New Project you must first either create a new schematic or open a schematic. To start a new schematic you first open eagle and then click on file in the upper left hand corner. Then click on new and then schematic. You will then be able to start populating the schematic work space. To place parts you press on the add icon located on the left side of the work space.
This space is very extremely sensitive to both spelling as well as capitalization for parts.
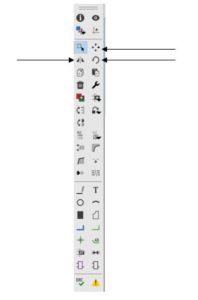
To move the parts around the board you must press on the move button and then on the cross on each part to move the part. To rotate the components it is the same procedure but you must press the rotation button first.
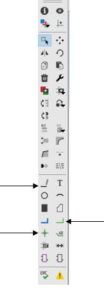
To connect the part you use the line or net button. If you would like two lines to branch from a single point or come to a single point you must use the junction button in the lower left corner.
Once the schematic is deemed correct it is time to create the PCB. To open an already existing schematic go to file and then open. This allows you to open the correct file.
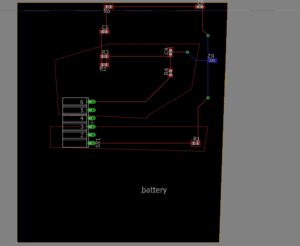
To create the PCB one must click on file and then on the button switch to board. To populate the board it is the same operation as the schematic. To move the parts click on the move tool and on the cross on the part. You will then be able to drag the part to the desired location.
EagleCad Training Part 2
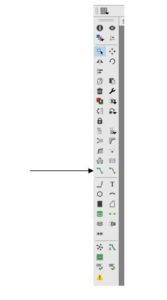
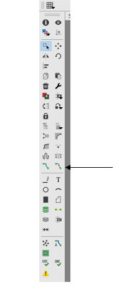
Once the board has been populated you be able to start creating traces. To create traces on the PCB the route tool on the left side of the work space must be used. To use this tool click on the route tool and then on the place you would like the trace to start.
It is common practice to always use 45 degrees when designing PCBs. To view the angle of being drawn click on the route tool and then at top of the page you will see the different possible angles available. To finish a trace click on the point you wish to end the trace.
To place parts on the bottom layer of the board the person placing the parts will need a mouse or will need to click on the mirror button. To place parts on the bottom layer with a mouse the user will have to click on the move button and then on the part. Once the part has been clicked on the person will click on the mouse wheel which will make the part turn blue which means that the part is on the bottom of the board. The mirror button will also be able to do the same thing in the PCB work space.
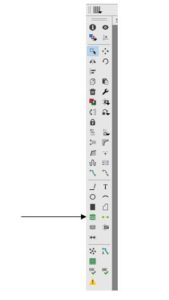
To run a trace to this part a via will need to be placed. The first way to place a via is too manually place the via using the via tool located towards the middle of the tool bar.
The second way to place a via to first run a trace to a certain point. The person will then click to stop the route but will still be able to draw a route. The user will go to the upper corner of the of the work space and click on the select layer drop down which is located next to the grid button. The user will select bottom layer which will create a via to which the top layer route will already be connected to. The user will then be able to continue the route in blue on the bottom of the board.
To remove an unwanted route the user must click on the rip up tool located next to the route tool.
To view all of the layers of the board you can click on the layers setting in the upper left corner of the work space.
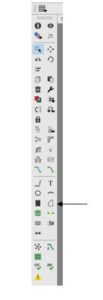
To create polygons it is key to remember that a polygon must start and end at the same point on the board. Polygons are useful in order to create power and ground planes for the whole board or specific portions of the board. Once created these can be moved or changed using the move tool. These polygons can be created on both the top and bottom layers using same layer selecting button. To name the polygon, the user must right click on the edge of the polygon and go to properties. The name of the polygon is case secretive and will be close to the bottom of the window. The naming of a polygon will allow for any part that is connected to that name to be automatically connected once the rat nest button on the bottom of the tool bar is collected. It is common practice to have either the whole top or bottom layer be power and the other layer be ground.
DRC checks are vital to completing a PCB layout. The DRC check used is the custom one made by Professor Hill. This DRC check is given below and should be the only one used because every fab house should be able to use this one. To use this DRC it will need to be downloaded and saved into the DRU files within the Eagle program. To perform a check click on the DRC check at the bottom of the tool bar. The user will then click on load and the correct DRC check. The user will then press the check button. This will generate an error report will have all of the errors of the PCB. The errors will need to be cleared for ordering of the board. It is also important to remember to turn on all layers before running the check.
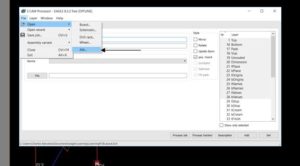
The last thing that is needed to create gerber files. To create gerber files you first go to the fab house that you plan on ordering from and seeing if they have the job files pre-made for you. OSH park already has these made for you and are easily downloadable. These job files once downloaded will need to be saved into eagle and specifically into the cam folder. Once the job has been saved it is time to generate the files. To generate the files go to file and then cam processor. Then go to file in the cam processor window and then open and then job. Click on the correct job and then make sure the files are being saved into the right area. To conclude the making of the Gerber files click on process job. If the cam files are unavailable from the fab house you wish to use then the cam files must be created in accordance with fabrication houses rules. To create these jobs one must click on the layer needed along with the names and file type. This concludes with pressing add and must be done for each layer.
Extra Training Material Provided by Eagle on YouTube

