Spring 2017 Velociraptor: Configuring the TCS34725 Color Sensor
Authors
By: Oscar Ramirez (MST)
-Body
Edited and Approved By: Jesus Enriquez (Project Manager)
-Introduction & Conclusion
Table of Contents
Introduction
One of the requirements for our Velociraptor was giving it the ability to count the number of dots it encounters in the maze. In order to solve this issue, we came up with a creative solution which uses an LED to signal that the Velociraptor has encountered a dot.
Requirement L2-2: The Velociraptor shall be able to count the number of dots it encounters in the custom maze using an SMD LED to indicate that it counted a dot
RGB Sensor
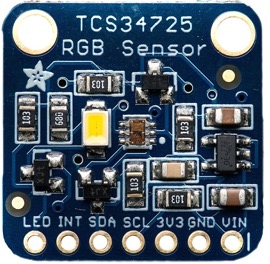
As part of our mission objective, the velociraptor must be able to detect the colored dots inside the maze that it will also be navigating. The TCS34725 color sensor does a great job of detecting a number of colors, from a long distance (about 4 inches). When the color sensor detects the dot inside the maze a led will illuminate, showing that the velociraptor has stepped over a dot. To begin, the color sensor had four pins that needed to be configured to the Arduino. The SDA and SCL pins were hooked up to analog pins A5 and A4 (SDA & SCL respectively). Then the Vcc and ground pins were connected to 3.3V and common ground inside our test circuit.
Figure 1: TCS34725 Color Sensor
Programming the RGB Sensor
To program the TCS34725 we first needed the associated library files. Once those were downloaded inside the Arduino library we were ready to begin. I first set the designated LED pin to an output inside the setup. For this experiment I tried only detecting the color red, but also included blue and green in case the color of the dots inside the maze were to change. I created three 16-bit variables to store the data that the sensor picks up and designated them blue, red, and green. Grabbing the data the sensor was currently picking up I stored it inside these variables. These numbers can fluctuate from around 200 all the way up to 4000 per color depending on the intensity and proximity of the color i.e. the closer and clearer the color, the higher the number. While placing the sensor over the color red it does give values of about 3000 but also gives values for blue and green at about 1000. To differentiate between colors I took the average of all of the colors and then divided the particular color by the average. By comparing these values with each other it was easy to differentiate between them. On the code this was done by creating 3 different if statements and comparing the value of each color to each other. If the detected color were red then the LED would illuminate, signaling that red was detected.
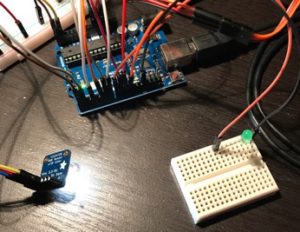
Figure 2: Color sensor facing flat detecting no color (LED OFF)
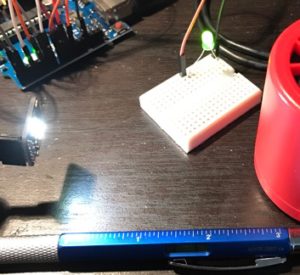
Figure 3: Color sensor detecting the color red from about 4 inches (LED ON)
Color Sensor Code:
Link: Color Sensor Arduino Code
Conclusion
This method for counting dots was the simplest form we could come up with in terms of electronics and coding. One issue that we came across was that we did not take into account how long to keep the LED on after encountering a dot. To solve this issue, it is recommended to work with sending telemetry back through the arxterra app to let the user know when a dot has been counted.


