Table of Contents
3DoT Custom Command Example – ArxRobot_Telecomm_Servo
Let’s step through a popular custom command in order to learn how to program a custom command in the Arduino IDE and execute it from the ArxRobot App or Control Panel.
Open the Arduino IDE and navigate to File -> Examples -> ArxRobot Library -> ArxRobot_Telecomm_Servo
The Arduino Code
At the top of our code, we have the usual including the ArxRobot.h library and creating an ArxRobot object so that we can call methods from the library such as ArxRobot.setCurrentLimit().
Then, we define two Servo3DoT objects:
Servo3DoT servoA;                   // Instantiate new Servo3DoT object
Servo3DoT servoB;
These function almost the same as the Arduino Servo.h Library you may be familiar with, but with extra features that we will see later.
Next, we define the custom command IDs. The IDs 0x00 to 0x3F are reserved for built-in commands, so our custom commands can use any ID between the hex numbers 0x40 and 0x5F.
I want to make 3 new commands. One for each servo, and then an extra slider to control the speed at which these servos move.
/*
 * Command Example
 * Step 1: Assign new command mnemonics ID numbers
 *         In this example we will be adding 3 new custom commands.
 */
#define SERVOA       0x41
#define SERVOB       0x42
#define SERVOSPEED   0x43
Next up, I will link these commands I just defined with a “handler” function. A handler function is simply the code that will be associated with each command. Add them to “onCommand” as follows, so that the ArxRobot Library knows what to do with each command.
/*
 * Command Example
 * Step 2: Register the SERVO commands by linking its ID to the corresponding handler.
 */
ArxRobot::cmdFunc_t onCommand[CMD_LIST_SIZE] = {{SERVOA,servoHandlerA}, {SERVOB, servoHandlerB}, {SERVOSPEED, setServoSpeed}};
“setOnCommand()” must also be called in the setup() portion of your code in order for this to work.
  /*
  * Command Example
  * Step 3: Tell 3DoT Robot software about new commands
  *         and perform any necessary setup.
  */
  ArxRobot.setOnCommand(onCommand, CMD_LIST_SIZE);
“Attaching” servos turns on the output signal to the servos. They will then hold their position at the angle they are set to. Let’s attach them in setup().
The mnemonics SERVO_A and SERVO_B correspond to the pin numbers of the two built in servo headers on the 3DoT, where SERVO_A is the connector closest to the switch.
  servoA.attach(SERVO_A);
  servoB.attach(SERVO_B);
Finally, let’s write the code for each servo command.
bool servoHandlerA (uint8_t cmd, uint8_t param[], uint8_t n)
{
    /* write(angle), write(angle, speed)
     *  angle = angle between 0, 180
     *  speed = 0 -> default speed
     *  speed = 1 -> minimum speed
     *  speed = 255 -> maximum speed
     */
    servoA.write(param[0], g_servoSpeed);

    return false;  // return false since we are not intercepting a predefined command
}
A custom command handler must always be of type bool. This is because they do not really need to return anything, but there is the option to hijack built-in commands such as the MOVE command. In this case, you can choose to call both the built-in command as well as your custom command, or only your custom command by returning true or false respectively.
Since we are not doing any of that, you don’t have to worry about it and can simply return false.
The parameters, (uint8_t cmd, uint8_t param[], uint8_t n), should also remain the same for each command handler.
cmd – the command ID, in this case either 0x41, 0x42 or 0x43
param[] – command data as an array of bytes. For example, if we make a slider in the ArxRobot app that defines a unsigned byte. Then param[0] will contain a value 0 – 255 set by the slider.
n –
Inside of the servoHandler, you can see there is only one line of code. servo.write(). This moves the servo to a defined angle.
servo.write() can be called one of the three following ways:
servo.write(angle)
servo.write(angle,speed)
servo.write(angle,speed,wait)
angle – An angle between 0 and 180. Note that, depending on the type, your servo may not move a full 180 degrees.
speed – A speed value. 0 = default speed, 1 = minimum speed, 255 = maximum speed.
wait – “true” if you would like your code to wait until the servo is finished moving before proceeding.
So, as you can see, we are setting the servo angle to whatever value is received from the app in param[0], and the servo will move to this angle at the speed g_servoSpeed.
servoHandlerB is just a copy of servoHandlerA, as they do the exact same thing.
bool setServoSpeed(uint8_t cmd, uint8_t param[], uint8_t n)
{
  g_servoSpeed = param[0];
}
Our last custom command, setServoSpeed simply sets g_servoSpeed to the value sent from the app.
Wiring
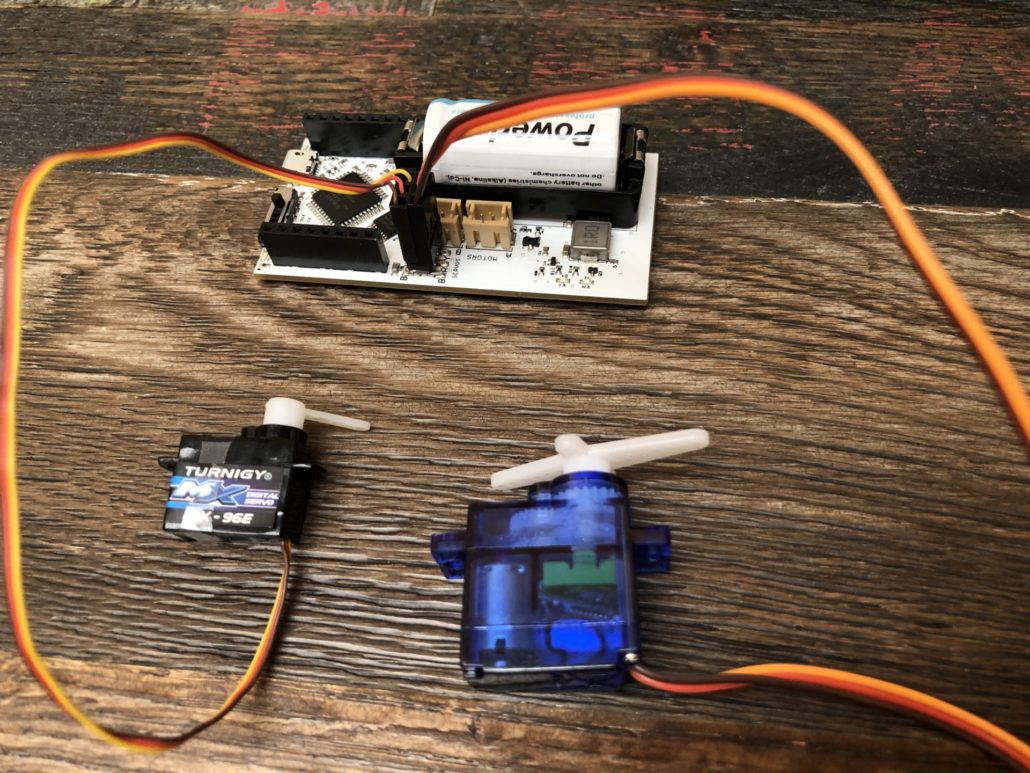
Simply plug in servos of your choice, making sure the Brown/Black wire is on the side of the “B” on the board.
Creating Widgets in the ArxRobot App
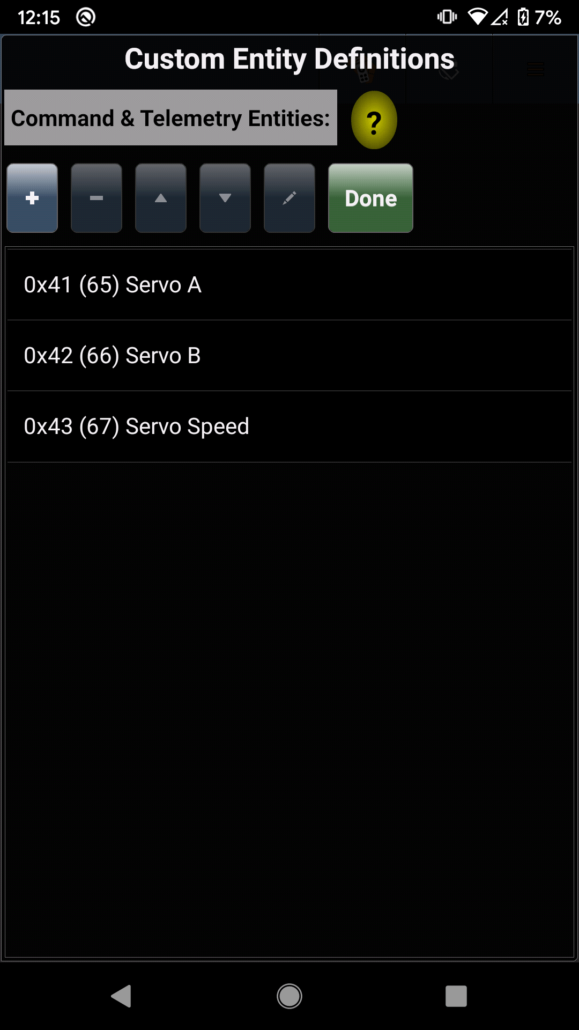
Now, let’s create widgets to use the custom commands we programmed. Open the ArxRobot App, turn on developer mode in the main menu, and navigate to Settings -> “Custom Command & Telemetry Configuration”.
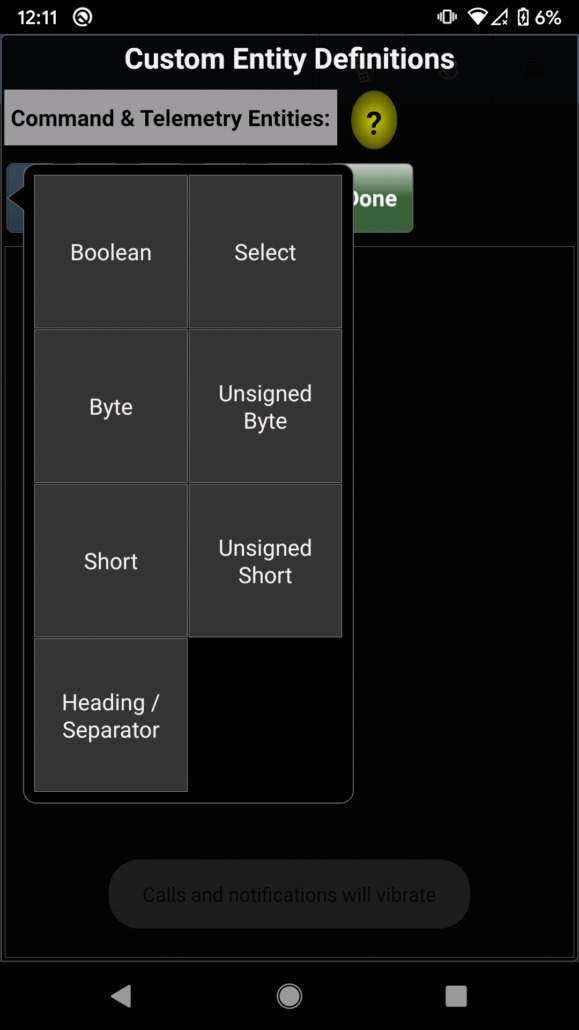
Click the + to add a new widget. Let’s make it an Unsigned Byte, so that it can send a value between 0 and 255.
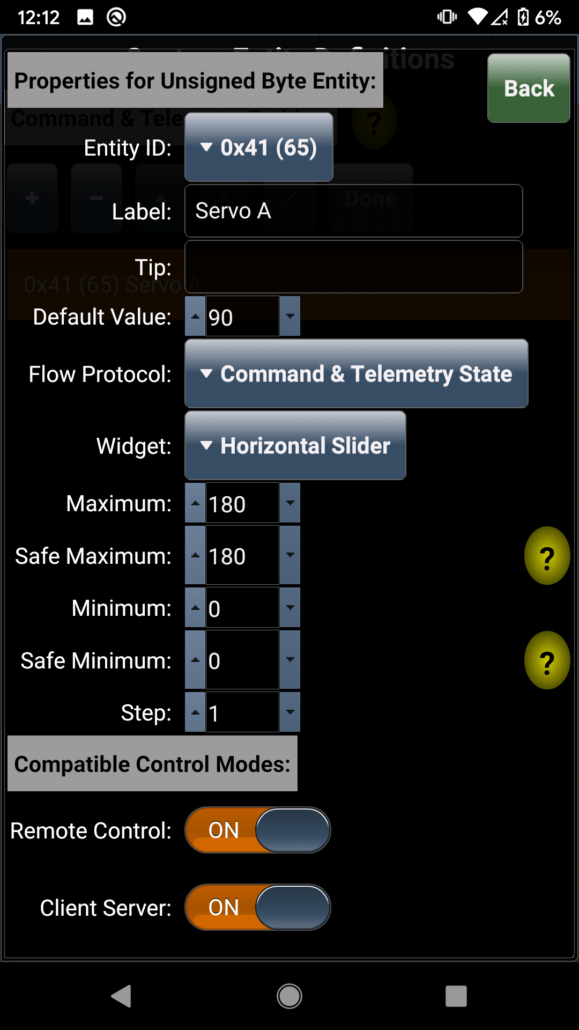
If you followed along so far, the settings to use here should be fairly self-explanatory.
Entity ID should be the same as the command ID we chose for this function in the Arduino program. Then, I’m going to set 90 degrees as the default angle, and 0 – 180 as the min and max.
Make sure to turn the two sliders at the bottom to ON, so that the widget appears in both the app and on the control panel.
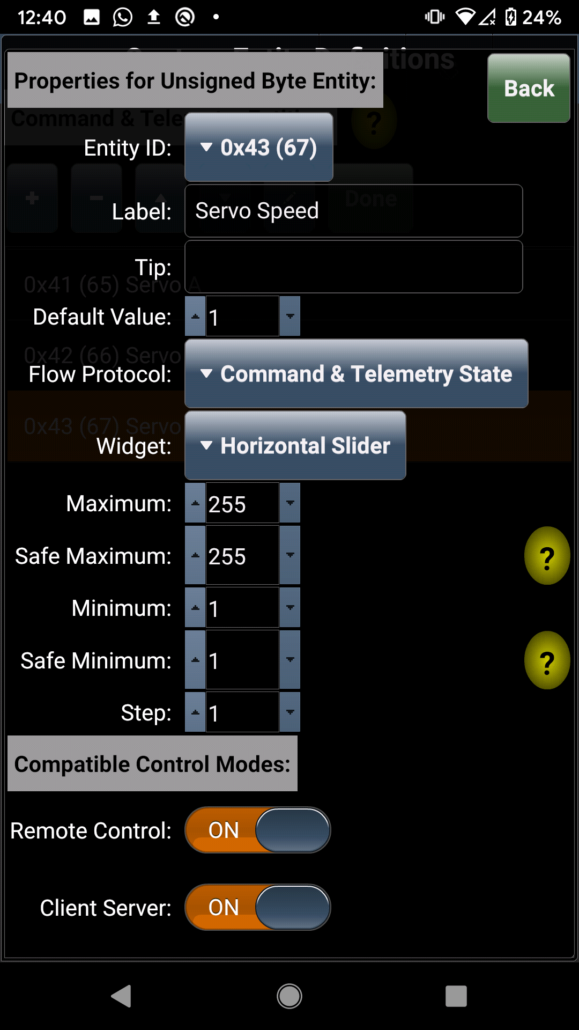
Repeat for Servo B and the setServoSpeed function. For setting the servo speed, I set the default to 1 and min/max to 1/255.

