Spring 2016 3D SMD: Aluminum Surface Table
By Henry Nguyen (Electronics and Control)
Table of Contents
Introduction
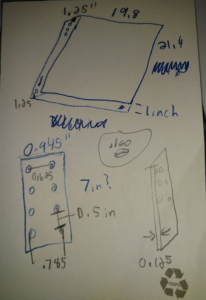
For our 3D SMD pick and place machine, it is extremely vital that we have an aluminum surface table in order to put our PCB, reel feeders, and IC tray. This surface table is to be the exact size of our makeblock X-Y plotter with the dimensions of 21.40” x 19.80” (inches). When designing this aluminum surface table, it is important to get all the dimensions correct and to have about 2 inches of each side in order to have a 1.0 inch bend on each side. This will allow us to attached our aluminum surface legs.
Design
Figure 0. Rough Sketch of Aluminum Surface TAble
Before manufacturing, it is vital that we design the aluminum surface table. After taking proper measurements, I was able to design the aluminum surface table on solidworks.
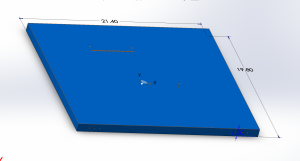
Figure 1. Aluminum Surface
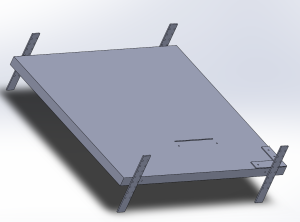
The image above is the aluminum surface with the dimensions of 21.40 x 19.80 x 1.00 inches. There is a slit and two holes on the surface for our reel feeders. Our reel feeder will screw into the holes and the slit is for our cut tape to go through the hole and under the surface table when operating. This is to prevent clutter. There are also 6 holes on the surface table with the dimensions of 21.40 x 1.00 inches. These holes are in the exact location as our XY plotter legs. This is for our legs to connect to our X-Y plotter and the aluminum surface.
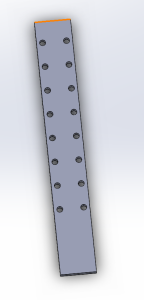
Figure 2: Aluminum Surface Leg (Solidworks)
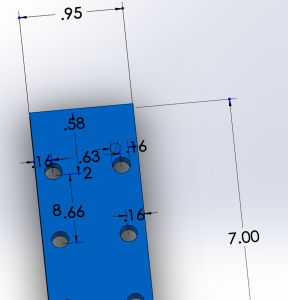
Figure 3. Aluminum Surface Leg Dimensions
The two images above is the Solidworks design of our aluminum surface legs and dimensions. Our leg will be 0.95 x 7.00 Inches long with 16 holes. These holes will allow us to attach our legs to both our aluminum surface table and X-Y plotter. The dimensions were accurately measured in order for our manufacturer to create an exact fitment. Each hole is 0.160 inches in diameter and is 0.66 inches apart center to center. The thickness of our legs will be 1/8 inch thick (0.125 inches).
Production
Figure 4. Aluminum Surface Table Assembled
The image above is how our aluminum surface table will look like. The clamping system, reel feeder holes, and slit will be done later when we finalized the exact placement. The clamping system cannot be implemented until we are able to assemble our X-Y-Z-A Axis for our machine which is when we will be able to define our origin. Once finding our origin, we will be able to implement our clamping system and reel feeder placement.
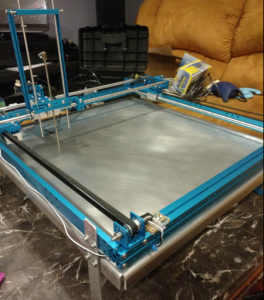
Figure 5. Aluminum Surface Table Manufactured
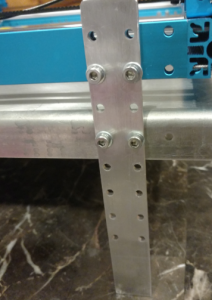
Figure 6. Aluminum Leg Manufactured
We were able to get our part manufactured with exact sizes as our Solidworks model. The reel feeder placement and clamping system will be defined later. As shown in Figure 6, we were able to attach aluminum surface table and X-Y plotter by our aluminum leg. With the design of multiple holes, we are able to move our aluminum surface table up and down by a multiple of 0.5 inches at a time.
Conclusion
Overall, I believe the design of this aluminum surface table turned out perfectly. The thickness of 1/8 T6 aluminum surface is able to support a PCB and many reel feeders that may be implemented in future semesters. When attaching our aluminum surface to our X-Y plotter, every screw was able to fit with ease. We used two washers and a hex nut for safety when connecting each of our legs to our X-Y plotter and surface table.

