Frame assembly
By Gregorios Rios – 3D Modeling
and Jessica Salazar – 3D Manufacturing
When I first got Sasha, she was not the prettiest Mendel 3D printer. Sasha’s rods were a bit rusty; wiring was held down good but aesthetically was not pleasing to the eye. I was even concerned that it would not work at all or not print properly. After she was plugged in, she was alive and all that was needed to be done was to do a bit of calibration. Prints were pretty well done. Of course there is always room for improvement, especially since now there are new and better frame designs.
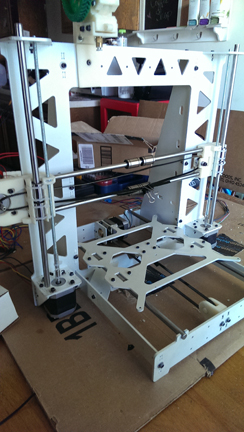
The Mendel printer is more of a triangular structural design weighing about 16 pounds, twenty inches high with and square base of sixteen by fourteen inches. When Jessica and I broke down Sasha, we realized that there were a lot of different components for a Mendel printer. It included printed parts, different rods, types of screws, washers and other miscellaneous part. Since the Mendel version requires so many parts it would require a lot of work in order to replace parts, repair or do any upgrades. Luckily the new P3Steel frame will take care of those issues. Once Sasha was broken down we separated everything that was going to be salvaged and parts that were not compatible with the P3Steel Design. The salvaged parts for the new frame were the Ramps board, most of the wiring, stepper motors, heated bed and 4 smooth rods.
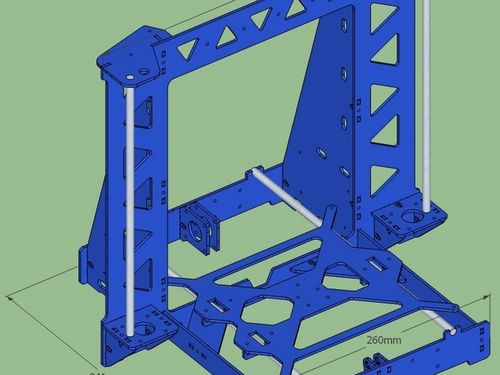
This is the new Sasha. P3Steel design is derived from the Prusa i3 frame. The main difference between Prusa i3 and P3Steel is that the frame is cut steel plate, along with the y-axis frame replaced the y-axis rods. This frame design has a stronger frame due to its construction which will reduce vibration which will increase accuracy. When the new Sasha is complete, the printer will weigh about 23 pounds, which is much heavier than the Mendel version but it is not enough to be considered a bad thing, unless you are planning to transport it frequently.
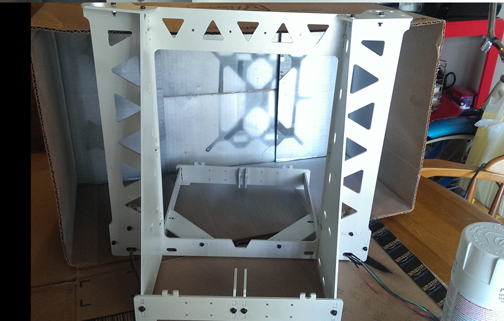
Since the frame was lasered from steel, it needed to be painted to prevent corrosion. Because the frame was lasered from specific measurement it was supposed to fit with enough clearance. But after being painted that extra layer of paint was enough for parts not to fit properly which caused scraping parts or take off the paint of the frame when assembling. After being built, I had to go back, primer the part that the paint was scratched off during assembly and then repaint it.
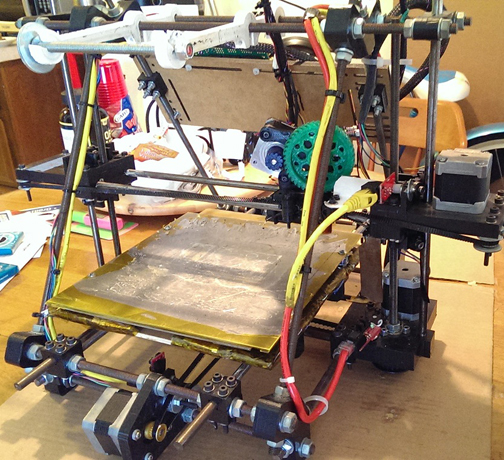
Before adding the y-axis rods on the y-frame, rods needed to be cleaned from corrosion. I used a bench grinder with a wire brush disk, which worked very well. All four rods needed to be cut and luckily Jessica knew where to get them to the correct measurements. When adding the y-axis rods on the y-frame, the rods would not fit the opening on the y-frame. For some reason they were too loose when installing the rods, either the rods were slimmer than the opening or the opening were too big. The solution for this was to buy Amazing Goop which is glue that works with metal. This added an extra layer on the openings giving it a really good fit without movement, which will reduces vibrations during printing.
There was another minor problem with the stepper motors. Some motors didn’t seem to take M3 screws; it was a mixture of M3 and M2.5. The only way to solve that issue was trial and error. Try different screws on each spacing and add extra washers because the screws were too long. In the end it was mounted very securely and was no longer loose.
After many hours, of putting together the frame, trial and error, we had a completed frame. All that was needed was to prepare the printed part to be mounted on the frame, pulleys, bearings and belts. This was result of a lot sweat, tears and blood.