Advanced Layout Editor: the Basics
Author: Christine Leiterman
Table of Contents
Introduction
If you have not already created your first blog post draft, see the page Blog Post 101 to see instructions on creating an account, creating a new blog post, and how to use the “General Blog Post” template.
This blog post shall overview the Advanced Layout Editor that allows authors to edit the content of a blog post that they have already created. Although this editor is less intuitive than the Default Editor, the Advanced Layout Editor allows the author to customize how the blog post is formatted, making it easier to input videos.
The Elements
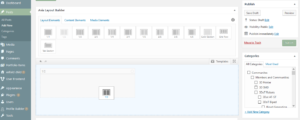
After clicking on the Advanced Layout Editor button to get into that mode, the Avia Layout Builder section near the top of the page should show three tabs: Layout, Content, and Media. In each of these tabs are icons that can be dragged down to the section right below, as shown.
Each of the tabs shall be explained in further detail.
Layout Elements
The Layout Elements tab includes all of the layout designs that can be implemented. The content can fill up the whole width, half width, or any of the shown fractions of the width of the webpage. Typically, for the blog posts that project managers (PM) are going to write for the senior design class, the whole- and half-widths are sufficient. The icons can be dragged into any order.
Content Elements
Media Elements
Media can also be implemented into blog posts. Some of the types of media includes images, audio, slides, and videos. Although most of these elements can be placed inside the Layout elements, the Easy Slider element that allows multiple pictures to be featured needs to be placed outside the Layout elements.
Note: for Easy Slider element, make sure the images are the same height, else the webpage automatically scrolls.
Images
Media can be implemented in the blog post via a few ways. One way images can be added is adding it in a Text Block. Another way is dragging the Image element from the Media Elements tab.
When editing the Text Block, images can be added by pasting the image in, but doing that may mess with the format. An easier way of implementing images is clicking the “Add Media” button and picking the image from a device or the website gallery.
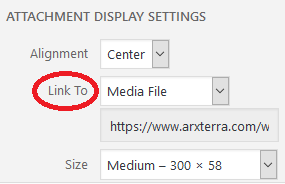
NOTE: Make sure the image is legible. To make the image expandable, make sure that “Link To” is set to “Media File.”
Getting Published
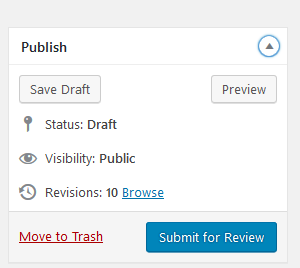
As an author status, PM cannot directly publish to the website. Thus, they can only “Submit for Review.” After the blog is submitted, the Quality Assurance person will review the post and either send it back for editing or publish the blog post.
NOTE: Preview the post to ensure that the blog post looks presentable and sounds coherent before submitting.
Editing using the Advanced Layout Editor allows writers to customize the blog post more easily. Although many of the tools are non-intuitive, with practice you will be making beautiful, useful blog posts in no time.
To learn more about ways to improve your blog posts, here are the Top 10 Blog Post Mistakes to avoid.


