Quality & Control Spring 2018
Blog Post 101
Author: Miguel Garcia (Quality Assurance)
Editor: Christine Leiterman
Table of Contents
Introduction
Blog posts you say? What in the world are those you ask? Well let me tell you, they are going to be the bane of your existence this semester if you allow them to be. My goal in creating this post is to make the process of creating these darn things as smooth as possible for you. I will try to lay out as much as I can, so buckle up and relax, cause we might be here for a while.
Why Blog Posts?
These posts aren’t here to make this semester even tougher on you, they serve quite an important purpose. These blog posts will basically provide a chronological history of your work over the semester. They are intended to capture the evolution of returning projects over several semesters. In addition, and this is probably overlooked, it provides a space where other students, professionals, and even potential employers can analyze and learn from the work being done by you. And finally, it gives you the students the ability to analyze, review, and learn from work done by students from previous semesters.
What to Blog?
Your blog posts will consist of this or that and everything in between. To be more specific, you will be posting about:
- Project Documents: Requirements, Block Diagrams, Interface Documents, Resource Reports
- Documentation of the Design Process
- Preliminary sketches of the design
- Back of the envelope calculations
- Trade-off studies
- System and Subsystem Models: Mathematical, Computer Simulations, Scale Models, Physical Models
- Full-scale Prototypes
- Mistakes, how they were discovered and how they were overcome
- And everything else!
Now I know this seems daunting at first, but do not worry, you should be given a task matrix on all the tasks that will need to be done, in order to achieve a successful demo at the end of the semester. You will have certain tasks assigned to you, which when completed, you will have to create a blog post about. So how do you create this post you ask? Well, I am glad you asked…kinda.
Getting Started with Arxterra
Before we dive into how to format a blog post, let us first go over who and how you will be posting them.
The Who
Over the semester, each group and group member will be assigned to a certain task, within the task matrix. It is the duty of whoever is assigned to that task to get it done, obviously, but it is also their responsibility to write up the blog post pertaining to that certain task. However, Project Managers and the Quality Assurance Engineer will be the only ones with the ability to edit and create posts on the actual site, Arxterra. Therefore, whoever is assigned the task, completes it, creates a draft blog post, and notifies their PM when completed. The PM verifies its contents and forwards to the Q/A for final approval. The Q/A manager is the only one who can actually publish the post, basically making it officially up on the site for all to see. For a more in depth look at this approval procedure, click here.
Making an Account
So as we have gone over, only PMs and the Q/A can create and edit posts on the actual site. With this in mind, they are the only ones who will need to create accounts on Arxterra, the site. They will be achieve this by doing the following:
- Visiting the site at www.arxterra.com
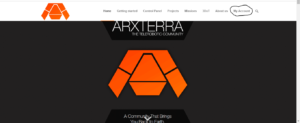
- Clicking on “My Account” and then “Register”
Getting Started
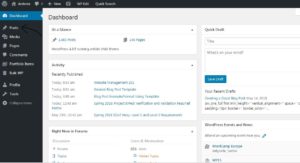
Now with your account made, you should see a black/grey box appear at the top of your browser window, hover over to the “Arxterra” tab, then click “Dashboard”.
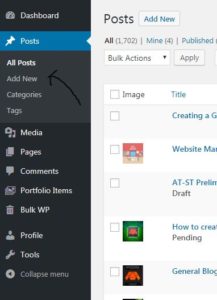
From here, you will be able to view all previous semesters blog posts and create new blog post drafts by clicking on the “Posts” tab on the left of the screen. To create a new blog post, simply select “Add New”.
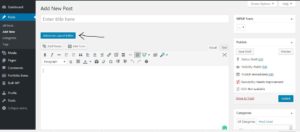
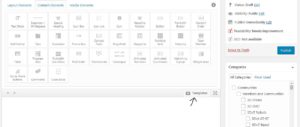
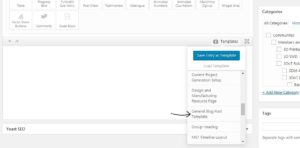
Now, from this window, this is where you will be creating and formatting your posts, so expect to be spending quite a bit of time here. From here, there are are many tools at your disposal. The two editors you have to use are either the “Default Editor” or the “Advanced Layout Editor”. The latter being a bit harder to use but allows you for much more control of how your post will look. From the default window, which would be of the “Default Editor”, there is the “Advanced Layout Editor” button, which once accessed, will display the many elements you can use when formatting your post. However, when creating your first post, I would recommend using a template, the “General Blog Post Template”, which will give you a nice layout to get you going. To access this template, click on the “Template” tab just below the display of elements, then from its drop-down window, choose “General Blog Post Template”.
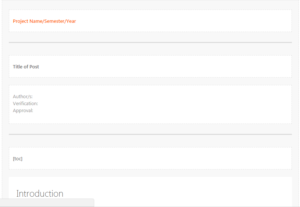
Now with this template opened up, you can now begin creating your blog post. All posts should follow the formatting of this template or very close to it.
Formatting
All posts will need to follow a specific formatting. An example post displaying the correct form of formatting, which was created using the template, can be viewed here. In addition, the top blog post mistakes and general guidelines can be accessed here. A couple more formatting guidelines are listed below:
- Blog post title specifies semester, year, and project name
- Example: Spring 2033: WonderCraft Trade-Off Studies
- All posts need to be verified by the PM, approved by the Q/A
- Their statements of verification/approval will be stated below the author of the post
- Need to have a table of contents, specified by the “toc” command, which should be specified after the Author/Verification/Approval statements
- All equations, calculations, tables, and graphs should be screenshots, which are numbered and annotated
- Center all included images
- Have all References/Resources links numbered and located only in your References/Resources section, which will be the last section of your post
- Make sure all included links are accessible
- All lists need to be bulleted or numbered
- Have Figure, Equation, Table, and Graph numbering separate from each other. For example, you can have a Figure 1, a Table 1, and an Equation 1
- All posts should be categorized on the site
- And this can not be stressed enough, correct all spelling and grammar issues, so, proofread
- Keep in mind that a future employer could read your post. You would probably want to express the idea that you know the difference between to and too
Featured Image
As specified in the blog post, “Top 10 Blog Post Mistakes“, all posts will need to have a squared featured photo accompanying them on the site. This photo adds a visual to the title of your post. For ideas, the teaser photo can be unique, or a small section or version of a larger photo that appears in the blog post.
Creating your Featured Image
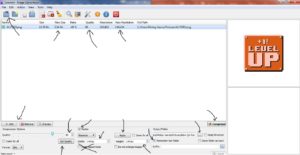
When creating your featured photo, keep in mind it needs to be squared and compressed. To achieve this, a compression software can be used, such as Caesium – Image Compressor. I would recommend the use of this software because it is free and very simple to use, but any image compressor software can be used. I personally downloaded Caesium off of sourceforge.net. To create a featured photo using this software, simply follow these steps:
- Add the picture you want to compress and/or resize using the “Add Pictures” tab in the top left or the “Add” function on the bottom left
- Make sure your photo is selected/highlighted within the window
- Under “Compression Options” on the bottom left, set the Quality to 80, hit “Set Quality”
- Check the “Resize” box at the bottom, then change the “Width” and “Height” values to 144 px (squaring it)
- DO NOT CHECK “Keep Aspect Ratio”
- Click “Apply” just below the “Resize” checkbox, this new dimension, displayed under the “New Size” column, will now be applied to your photo
- Specify your output folder on the bottom right, this is where your new compressed photos will be placed
- Check the “Remember last folder” box
- Hit “Compress” at the bottom right
- Your new image size and resolution quantities will now be displayed at the top
Uploading Your Featured Image
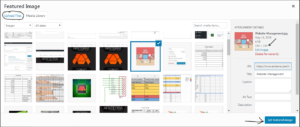
The job of actually uploading the featured image will fall under the Project Managers. To upload the image, navigate to the “Add New” post window, which was explained earlier. From this window, scroll down and locate the “Featured Image” tab, which should be on the right. From here:
- Click the tab “Set featured image”
- From the new window, select “Upload Files”
- Select and upload the featured photo you created
- Make sure the image is 144×144 (squared)
- Select “Set Featured Image”
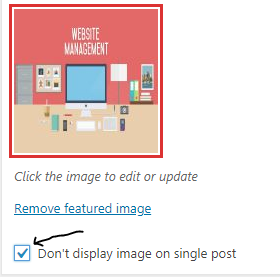
- Make sure the “Don’t display image on single post” box is checked
- Your featured image will now be displayed along your post
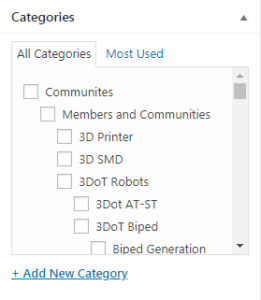
Selecting A Category
Advanced Layout Elements
Here, I will go over the two basic Advanced Layout elements you will mostly use when creating a post on the site.
- Mostly all the elements you will be using are located under the “Content Elements” tab
- You simply drag and drop the element you want to use into the editing window
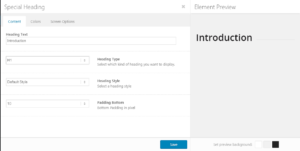
Special Heading
- “Special Heading” is used to create, well, a special heading. You should use it to specify the different sections of your post, such as the Introduction, Body, Conclusion, and References
- Within its window, you can specify the section title, heading type and style, which a preview will be displayed on the right
- Important: When selecting the heading type, keep in mind that “H1” will be displayed as main sections within your table of contents, while the subsequent heading types will be displayed as subsections
- For example, “H3” will be displayed as a subsection of “H2”, which will be displayed as a subsection within a section specified under an “H1” heading type
- Important: When selecting the heading type, keep in mind that “H1” will be displayed as main sections within your table of contents, while the subsequent heading types will be displayed as subsections
- Within its window, you can specify the section title, heading type and style, which a preview will be displayed on the right
Text Block
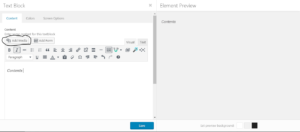
- “Text Block” is where you will place the bulk of the content for your posts
- Here you have access to functions found similarly on Word
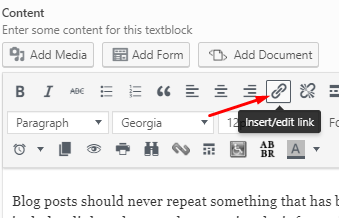
- You can bold, italicize, create bullet points, create links, and add images within its window
- A preview of what you are placing into that “Text Block” will be displayed on the right
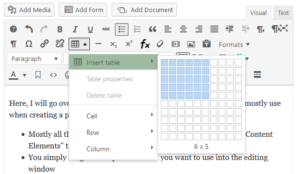
- To include tables, click the Table icon

- Indicate the table size by clicking on one of the squares
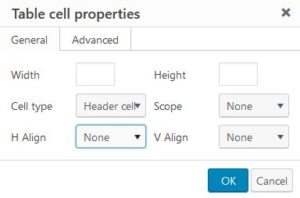
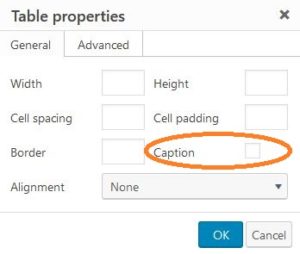
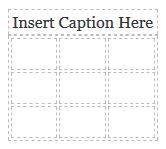
- The cells and table can be customized by clicking “Table Properties,” or “Table Cell Properties.” Make sure to check the box next to “Caption” in Table Properties. After pressing ok, you can edit the caption by typing in the dotted lines above the table.
Images
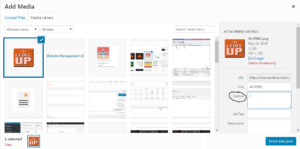
To place images, click “Add Media”
- From this window, select a file to upload, and make sure to include a caption for your image, which will include the Figure # and a brief annotation
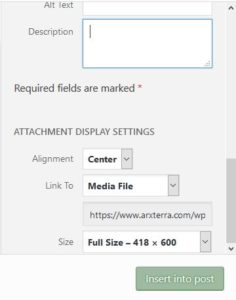
- Before clicking “Insert Into Post,” scroll down to see the Attachment Display Settings. Make sure that the image is centered and that the size is appropriate for the blog post layout. You may need to preview the blog post multiple times before the image is to your liking.
Videos
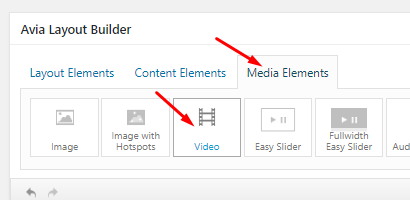
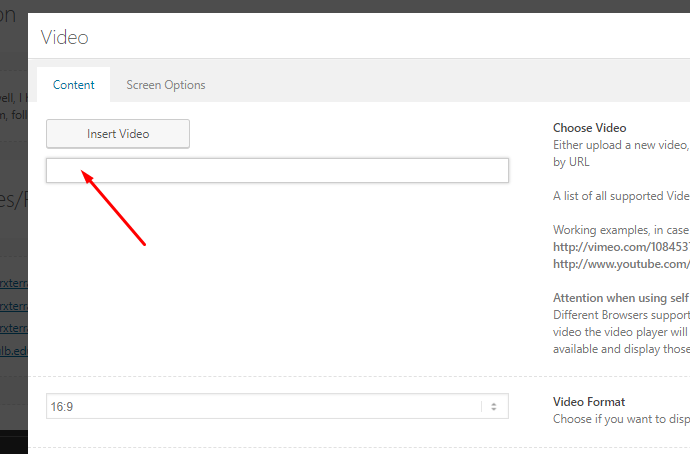
Videos are a great addition to the blog posts. To include a video, you will need to upload it YouTube, and simply include a link. When the blog post is created, the link will allow the viewer to open the video in a new window.
Hyperlinks
Blog posts should never repeat something that has been previously posted. If you are using calculations from a previous semester’s blog post, simply include a link to the post that contains the information.
Your blog posts should contain new information only. Any work that has been previously completed, datasheets, retailers, etc., can simply be linked to.
Final Remark on Procedure
The basic gist of the timeline of creating to the uploading of a blog post is as follows:
- A task is assigned, to a company member, from the task matrix
- Whoever was assigned the task, works on it
- They create a blog post updating as they complete the task
- Once finished, they notify their PM to check the document
- PM verifies the content, checks again if the correct format/layout is used
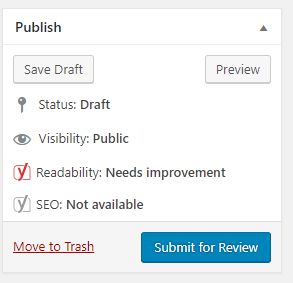
- PM then submits the post for review
- Q/A then reviews it and the post is published or it is not
- The Q/A will pass the post back to “draft” if it lacks proper formatting or publishes to the site
- If passed back to draft it will be up to the member and the PM to correct
Again, a more in depth look at the interaction between PM and Q/A can be found here, under “Future Review Procedure”.
Project Manager Checklist
Blog Post includes a Featured Image.
Blog Post includes Authors name and position.
All photos have been resized, compressed, and have a resolution of 72dpi.
Photos, tables, graphs, are labeled and have explanatory text.
Text within an image or table is readable
Blog post does not include material from a previous post. If you are using calculations from a previous semester’s blog post, simply include a link to the post that contains the information. There are exceptions to this rule. If you are not sure ask the instructor.
All photos are original to the project.
Images, including screen captures of tables, are readable.
Make sure to proofread to catch any English, typos, and other errors.
Look for Plagiarism
Only post to your area
Only upload individual photos once (Delete extra copies)
Use the preview function so you can view what the post will look like when it goes live. This will allow you to make any final corrections or changes.
Conclusion
To conclude this, well, I hope you paid attention. You may not realize this now, but these blog posts are quite essential to the class. I hope this blog post will help relieve a bit of the headache they can potentially cause. Just stay on top of them, follow the format, get them published by their due date, and you should be all right.

