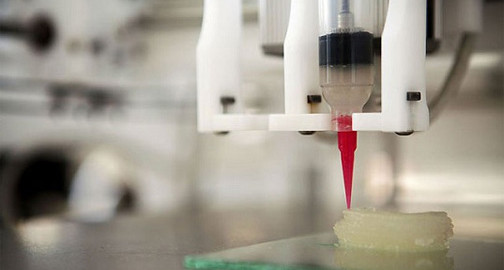
Bioprinter “Ink”

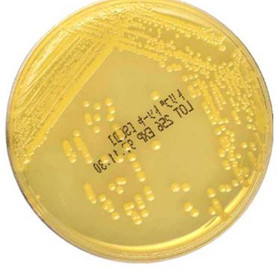
Above, Agar plate with growing cells

By Ali Etezadkhah, Project Manager

To grow and take shape, cells need a skeleton or scaffold to attach to.  They also need access to nutrients to survive.  There are many different types of cell growth media and they range from pure liquid to a solid gel.  Most people have had experience with the solid type in their Biology class.  Petrie dishes covered with a thin layer of agar are used for growing cells in biology labs.

 Agar is a combination of the linear polysaccharide agarose and heterogeneous mixture of smaller molecules called agaropectin.  Because it is a mixture of different types of molecules, the gelling point of agar is unpredictable.  Controlling the gelling point is very important for 3D printing.  As such, agar is not a good choice as the “ink” for the printer.

A pure form of agarose is available for a number of manufacturers.  It is usually used to separate DNA fragments based on their size and molecular weight.  The procedure is called electrophoresis and utilizes an electric current and a sieve created by the solid agarose gel.  Because it is a pure molecule, agarose has a very tight gelling point, a very desirable property for 3D printing.  In addition to the narrow gelling temperature range, agarose also provides a sturdy gel when solid.  We chose a formulation with very high gel strength to ensure our printed objects hold their shape.  We chose formula A0169-10G manufactured by Sigma-Aldrich.

This agarose formula melts between 86.5 and 89.5 degrees Celsius and gels between 34.5 and 37.5 degrees Celsius.  This hysteresis is a valuable property because it gives us plenty of time to load the gel into the printer after it has melted.  The published gel strength is 1200 gm/cm2, which is the amount of weight needed to depress the gel a distance of 4mm with a 10mm probe without breaking the gel.

Commercial bioprinters use two extruders, one to print pure agarose gel and one to print a watery solution of cells.  This allows the operator to create intricate tissue or organs.  Our printer only has a single extruder so we are limited to printing with a mixture of agarose and living cells.

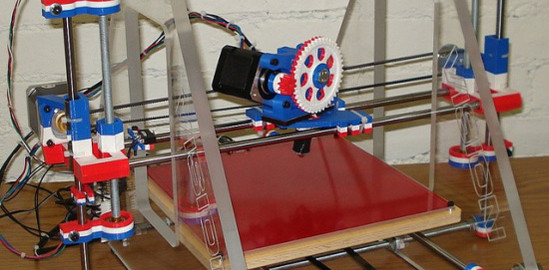
Original Mendel Model

By Anh Nguyen

ADVANTAGES:

  • Simple to build.
  • There are a lot of information, manual and video to help building.

            http://reprap.org/wiki/Mendel_Build_Manual

            http://www.youtube.com/watch?v=mpOZ1GNZmmU

  • Big print area, smaller machine footprint
  • Light and portable
  • The price is reasonable and within budget.


DISADVANTAGES:

  • The frame and the joint junctions are not stable in the x-axis. The head moves in the x-axis and it is heavy à causing the frame the move in the x-axis. This can cause a problem of precise printing.
  • It is hard to maintain. Have to remove a lot of things to change one detail. The electronic circuit is on top à difficult to reach some area under.
  • Required a lot of calibration when something goes wrong or needed to change.
  • A lot of wire strain. When the base moves, it creates the strain on the wire and the wire can be broken when using a lot.
  • 2 z-axis motor. Difficult to adjust both sides for the same amount. Moreover, the standard stepper motor is built for only 2A. The 2 motors use more than 2A, which heats the stepper motor is hot and can shut down for a few milliseconds and affect the precision of printing.
  • Hanging z-axis.
  • 1/2 COST
  • $520 – $600


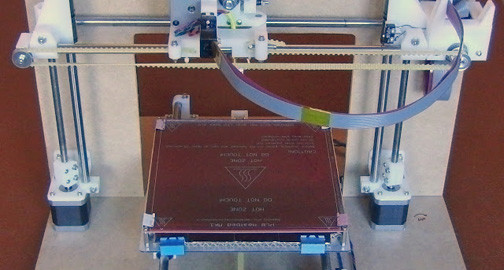
Mendel90

By Mevan Fernando

Mendel90 Build Manual:  http://reprap.org/wiki/Mendel90_Build_Manual#Getting_Your_Parts
More info: https://github.com/nophead/Mendel90
http://reprap.org/wiki/Mendel90_Buyers_Guide
http://www.thingiverse.com/tag:mendel90

Advantages

  • Designed by Nophead (Good parts/service available from Nophead, very detailed, high quality instruction manual, shared his design through his blog: http://hydraraptor.blogspot.com/2011/12/mendel90.html )
  • Sturdy structure means faster speeds in the x and y directions
  • Easy to assemble
  • Not a lot of calibration is required
  • Open frame design, allowing it to be worked on easily and mostly disassembled without falling apart
  • Ribbon cables are used to prevent cable tangling and friction
  • Less need for adjustment
  • Great reviews from Mendel90 owners

 Disadvantages

  • Critical hole dimension and spacing
  • The platform moves in y as well as z directions
  • MDF is the cheapest material that could be used to build the frame but changes in weather may cause it to expand or contract. Aluminum is a better choice but it’s more expensive (Materials that could be used for frame: MDF, polycarbonate, acrylic, Dibond, aluminium).

The budget for this project using Nopheads Mendel90 kit would be around $1100.

If we buy our own parts our budget would range from around $600-$800 depending if we could get some of our parts printed out and the material we use for the frame.


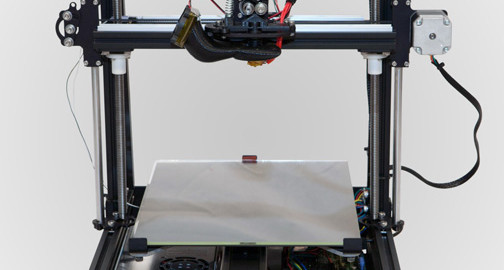
Laur3k-3D Printer by OpenBuilds

By Omair Tariq

(Information on the Laur3K can be found here)

Advantages:

  • A lot of documentation (Pictures, Videos Parts list)
  • Without belts
  • Skechups of parts for printer also available

Disadvantages:

  • Print beds moves in y and z directions
  • Uses a lot of 3d printed pieces
  • Costs about $700. (Without printed parts, wiring, and controller)

How Does BioPrinting Work?

By Omair Tariq, Systems and Test Engineer

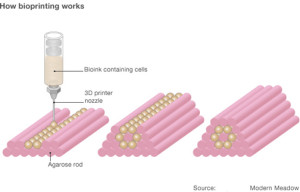
How bioprinting works:

In order for cells to survive and grow, they need a certain environment. This environment is provided in gel scaffolds, referred to as biopaper in laymen’s term. There are several ways of 3D bioprinting. One of these ways is to print a layer of gel and then a layer of cell in a repetitive manner until the desired structure is obtained. Another method of 3-D bioprinting is to first print a gel scaffold and then facilitate cell growth in the gel scaffold by injecting in cells.

There are various types of gels that can be used as biopaper to meet this purpose: agar, agarose , polyacrylamide gel etc. Due to a lack of availability of funds and equipment, it will be very difficult for us to verify at the cellular level whether the cells have grown correctly or not. Therefore, this semester, we will concentrate on utilizing the 3D bioprinter for the generation of 3D gel scaffolds. 

bio


Organovo NovoGen MMX Bioprinter

Untitled-1


HowUntitled-1

MendelMax 2.0

By Ali Etezadkhah, Project Manager

 Advantages:

  • Open and rigid frame
  • Can be built using hand tools or CNC machine
  • Extruded and flat plate aluminum
  • Linear rail-based x and y axes with smooth and quiet operation and less maintenance
  • Faster printing possible due to increased rigidity
  • Second generation solves problems with the first generation
  • Heavy and stable
  • Aesthetically pleasing

 Disadvantages:

  • Expensive at around $1500
  • Single-axis head and single-axis bed means the bed is not stationary
  • Heavy and difficult to move around

More information at:

http://reprap.org/wiki/MendelMax_2

http://www.mendelmax.com/

This model would be a good choice for our project due to its resolution, speed, and printing area.  However, the printing bed moves along y and z directions.  It’s a mature model with plenty of documentation online from the creator as well as multiple forums dedicated to it and previous models.  There aren’t many cons to this printer except the price.  At around $1500, it is more than our proposed budget.

Spring 2014 BioPrinter

By Ali Etezadkhah, Project Manager

Team members:
Ali Etezadkhah – Project Manager
Mevan Fernando – Sensors, Actuators & Powertrain
Anh Nguyen – Controls & Image Processing
Omair Tariq – Systems and Tests

Our team has chosen to continue the work on the 3D bioprinter that was built last semester.  We explored using different printer designs, but most of the models have a building platform that moves in the horizontal plane as well the vertical plane.  Since we plan to use a heated gel to print, a stationary platform that only moves along the z-axis is preferred.  In the next few blogposts, we will publish our research into different 3D printer models.

The team from last semester was able to print 3D structures using silicone, but silicone remains fluid until it dries in a few hours.  Our challenge is to design an extruder optimized to print using a biological gel.  When printing with plastics such as PLA or ABS, the extruder temperature is not critical and the structure begins to solidify immediately after extrusion.  This is due to the large temperature differential between molten plastic, which is around 200°C, and the room temperature.  When printing with biological media, the gel must be mixed and kept warm as it is loaded into the extruder.  The temperature of the extruder must be maintained precisely to keep the gel right at the gelling temperature.  As soon as an element is laid out by the print heat, it must be cooled quickly to maintain the structure.

The printer from last semester does not have a temperature controlled extruder.  It also lacks the capability to cool the structure as it is being printed.  Our challenge is to modify and redesign the printer to be able to print using biological media.