Understanding the Communication between Your Arduino and Android Phone

By Tommy Sanchez

This guide will help you start communicating between your robot and an android phone. The topics covered are: how to connect your phone to the Arduino, the communication from phone to Arduino for commands for your robot, and communication from the Arduino to the phone for telemetry.  Make sure to view the Getting Up and Running tutorial, along with the one on Custom Commands beforehand. A link to the Arduino Code for communication is also found in this guide.

An important thing to note is that there are two ways of physically connecting your phone to the Arduino, which is explained on the guide. In efforts to check communication compatibility on your phone, please be sure to have both applications discussed on the Getting Up and Running tutorial installed on your phone. This will allow you to try both connection types if one of them doesn’t work for you.

Click on the link below to download the PowerPoint communications tutorial:

EE400DCommunicationCode

Creating Custom Commands With the Arxterra Application

By Tommy Sanchez

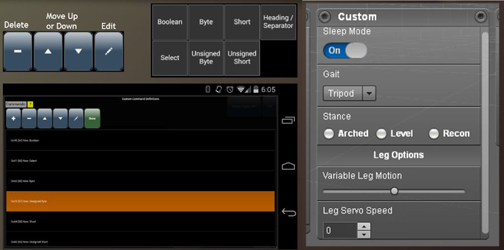
If you have read the previous tutorial on getting up and running with the control panel and applications, then you’re ready to learn how to create custom commands through the Arxterra application. These custom commands will allow you to expand the capabilities of your robot. In outline form this tutorial covers: creating a custom command, the command control panel interface, and implementation examples.  

Types of command options:

  • Boolean
  • Select
  • Byte
  • Unsigned Byte
  • Short
  • Unsigned Short
  • Heading/Separator

Each of these are covered in depth. Command types must have their own unique identifier called a Command ID. This ID can be chosen from a range of 0x40(64) to 0x5F(95). Command types also have 1 or 2 value bytes associated with the command. These bytes are used by the microcontroller to identify what instruction it’s receiving.

While you are walked through adding a command type you will also be able to see each command type’s interface on the control panel. To take it a step further once you know how to add a command and know how it appears on the control panel, you will be shown implementation examples for robots such as a Biped, Hexapod, and Rover. As a quick example, Boolean can be used as an On/Off switch for the legs of a Biped robot. How the data is sent over to the microcontroller in the form of a byte array is also covered.  The provided link below will take you to an easy to follow PowerPoint tutorial outlining these topics. Enjoy.

PowerPoint Tutorial:

http://www.csulb.edu/~hill/ee400d/Lectures/13_Arxterra%20Commands.pptx


Get Up and Running With the Arxterra Control Panel & Android Applications

By Tommy Sanchez

If you are interested in controlling your robot with the Arxterra control panel, you have come to the right place. For your robot to be controlled through the control panel, you will need to have an Android phone for communication with your Arduino. This guide will show you how to create an account with Arxterra, get access to the alpha testing for the Arxterra applications, connect on the applications, and log in to the control panel. The provided link below will take you to an easy to follow step-by-step PowerPoint tutorial outlining these topics.

PowerPoint Tutorial:
http://www.csulb.edu/~hill/ee400d/Lectures/12_Arxterra%20Login.pptx