Fall 2016 Velociraptor (W): Custom Telemetry Commands
![]() By: Gifty Sackey (Mission, System, and Test Engineer)
By: Gifty Sackey (Mission, System, and Test Engineer)
Approved by:
– Lam Nguyen (Project Manager)
– James Lee (Division Manager for Mission, System, and Test)
Table of Contents
Introduction
Inaddition to the custom command for static walking that was created for the Velociraptor (W) group, we also created four additional custom telemetry commands. For the telemetry we will be displaying the roll, pitch and the left right rotary sensor values. A rotary encoder will be able to tell us how much in each direction the encoder has been turned. The custom command is when we have information that is being sent to the robot from the user. The custom command that we created for static walking for instance; it lets the Velociraptor know when to start walking. However, telemetry would be the robot sending back information to the user what the leg placement is.
Telemetry Commands
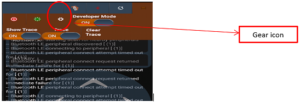
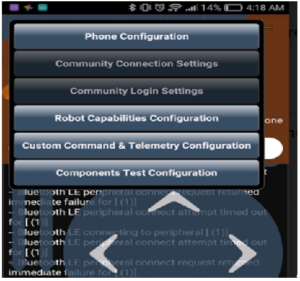
Similar to the custom commands being set up on the Arxterra App, the telemetry commands are also set up in the application. Both the custom commands and telemetry are set up in the developer mode which can be accessed on the main menu. Once the Arxterra app is open and the developer mode has been started, click on the gear icon that is right below the camera image. Select custom command and telemetry configuration from the drop down menu that pops up. By clicking on the “+” sign that pops up, the user is able to create the telemetry commands for the roll, pitch, rotary left and rotary right commands.
Diagram 1: Developer mode with gear icon
Diagram 2: Possible Option List : Select Custom Command & Telemetry Configuration
Key Commands
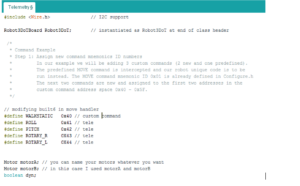
For each of the commands created, the user would need to assign a specific hexadecimal value to it. For the roll, pitch, rotary_r and rotary_l commands, the hexadecimal values that were assigned were 0x41, 0x42, 0x43 and 0x44 respectively. A figure of the assignments can also be found below this section of the blog.
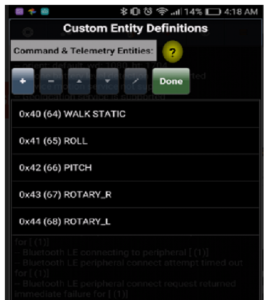
Diagram 3: Telemetry command hexadecimal assignments
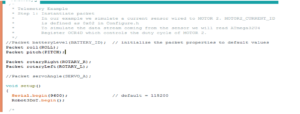
Once the custom telemetry commands have been created in the Arxterra app, there are a few additional lines of code that would need to be included in the Arduino code in order to be able to receive values. In the Arduino code, the user would also need to define the variable names with their respective hexadecimal values. A Packet ID would also need to be created to in order for the program to know that it is the start of a telemetry command.
Diagram 4: Arduino assignment of custom telemetry commands
Diagram 5: Packet ID created for each telemetry command
Testing
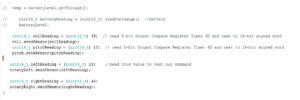
For the figure 6 below, hard coded values of roll =35, pitch = 10, rotaryLeft = 23 and rotaryRight = 46 were created in order to test the telemetry commands and determine if any values were received on the control panel. Unfortunately for the Wednesday velociraptor group, the electronics engineer was unable to include his actual coding commands for the sensors with the telemetry code. As a result, the only way the Wednesday velociraptor group was able to test the telemetry code was through hard coded values and not by actually receiving the senor values.
Diagram 6: Telemetry code testing
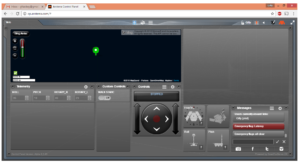
For figure 7, viewers are able to see the hard coded telemetry values of roll =35, pitch = 10, rotaryLeft = 23 and rotaryRight = 46 being displayed on the control panel.
Diagram 7: Arxterra Control Panel displaying the telemetry output
Resources
- None

