Goliath Fall 2017
Led Grid Display
Mark Huffman (Project Manager)
Introduction
By Mark Huffman (Project Manager)
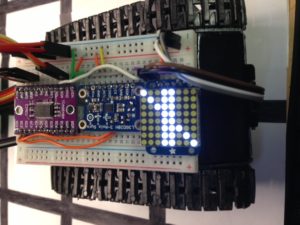
Based on our L1 requirements to have a LED display and the L2 sub-requirements to indicate the next turn direction, having an LED grid display was a stretch goal. After some (what turned out to be pretty simple work) the LED proves very useful in indicating to the user the intended direction when user input is needed. Also, it is used to indicate when an object is detected.
The LED 8×8 display we picked is easily controlled by HT16K33 display driver, which makes making shapes and patterns simple. Plus, it uses the I2C interface keeping the connections from the microcontroller low considering that 64 individual LED’s are being controlled.
Source Material
Symbols Used
By Mark Huffman (Project Manager)
Since the display can draw any pattern on the 8×8 matrix, symbols were used to indicate particular meanings. These are explained bellow:
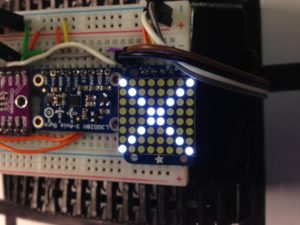
No-Movement (X)
Is displayed whenever “Allow Movement” is unselected on App or control panel. All motor functions will stop working, but other internal functions will remain running. Safe to use when travelling straight or forward. Indicated at startup by default.
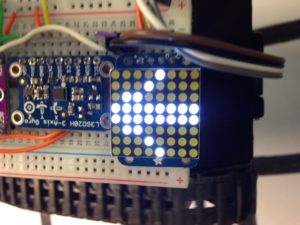
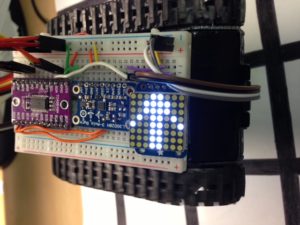
Travel Direction (ARROW)
Is displayed whenever the bot is moving or plans to move in a particular direction. The direction will change once the sensors pick up an intersection and a turn is required. Therefore, just before actually turning and while turning it will indicate the new indicated direction.
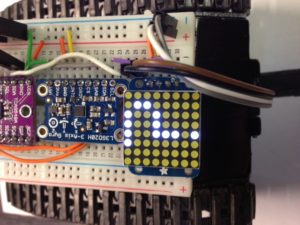
Next Decision (?)
When using record mode and at an intersection with multiple open directions, the bot will stop moving and a flashing question mark will be displayed. This will remain displayed and flashing until a direction decision is made by the user.
Obstacle Detected (Path Blocked)
When “Obstacle Avoidance” is turned on and an object is detected in front of Goliath this symbol will flash for 5 seconds. This will happen everytime an object is in front of Goliath.
LED Control Code
By Mark Huffman (Project Manager)
The majority of the code needed to control the LED display is provided by two Adafruit libraries:
LED Backpack: https://github.com/adafruit/Adafruit_LED_Backpack
GFX Display: https://github.com/adafruit/Adafruit-GFX-Library
The LED backpack library contains all the code to communicate over I2C to the LED driver. Using this driver is simple.
The GFX library provides easy functions to display shapes, dots and even text automatically on any LED display.
The issue of using both these libraries is that combined, they take a huge space of the available program memory space on the Arduino. The entire library with our final code would not have been possible since alone these libraries take over 40% of the Atmega32U4 memory space. So instead these libraries were stripped down for our project to only include the functions we needed to display lines and dots. This made making shapes more time consuming but, reduced the memory footprint significantly.
Goliath LED Code
By Mark Huffman (Project Manager)
Based on the action determined internally, LEDDirection is called with the string argument being the intended symbol to display.
void LEDDirection(String dir) {

  matrix.clear();      // clear display

  if (dir == "Foward") {

    matrix.blinkRate(0);

    matrix.drawLine(0, 3, 7, 3, LED_ON);

    matrix.drawLine(0, 4, 7, 4, LED_ON);

    matrix.drawLine(0, 4, 4, 7, LED_ON);

    matrix.drawLine(0, 3, 4, 0, LED_ON);

  } else if (dir == "Right") {

    matrix.blinkRate(0);

    matrix.drawLine(3, 0, 3, 7, LED_ON);

    matrix.drawLine(4, 0, 4, 7, LED_ON);

    matrix.drawLine(4, 0, 7, 4, LED_ON);

    matrix.drawLine(3, 0, 0, 4, LED_ON);

  } else if (dir == "Left") {

    matrix.blinkRate(0);

    matrix.drawLine(3, 0, 3, 7, LED_ON);

    matrix.drawLine(4, 0, 4, 7, LED_ON);

    matrix.drawLine(4, 7, 7, 3, LED_ON);

    matrix.drawLine(3, 7, 0, 3, LED_ON);

  } else if (dir == "Around") {

    matrix.blinkRate(0);

    matrix.drawLine(0, 3, 7, 3, LED_ON);

    matrix.drawLine(0, 4, 7, 4, LED_ON);

    matrix.drawLine(7, 4, 4, 7, LED_ON);

    matrix.drawLine(7, 3, 4, 0, LED_ON);

  } else if (dir == "?") {

    matrix.blinkRate(1);

    matrix.drawPixel(4, 0, LED_ON, 1);

    matrix.drawPixel(4, 2, LED_ON, 1);

    matrix.drawPixel(4, 3, LED_ON, 1);

    matrix.drawPixel(4, 4, LED_ON, 1);

    matrix.drawPixel(3, 4, LED_ON, 1);

    matrix.drawPixel(2, 4, LED_ON, 1);

    matrix.drawPixel(1, 5, LED_ON, 1);

    matrix.drawPixel(1, 6, LED_ON, 1);

    matrix.drawPixel(2, 7, LED_ON, 1);

    matrix.drawPixel(3, 7, LED_ON, 1);

    matrix.drawPixel(4, 7, LED_ON, 1);

    matrix.drawPixel(5, 7, LED_ON, 1);

  } else if (dir == "X") {

    matrix.blinkRate(0);

    matrix.drawLine(0, 0, 7, 7, LED_ON);

    matrix.drawLine(0, 7, 7, 0, LED_ON);

  } else if (dir == "O") {

    matrix.blinkRate(1);

    matrix.drawLine(3, 0, 3, 7, LED_ON);

    matrix.drawLine(4, 0, 4, 7, LED_ON);

    matrix.drawLine(0, 0, 7, 7, LED_ON);

  }

  matrix.writeDisplay();  // write the changes we just made to the display
}
The stripped down LED library combined with needed GFX functions.
Adafruit_LEDBackpackCom.cpp
/***************************************************

  This is a library for our I2C LED Backpacks
Designed specifically to work with the Adafruit LED Matrix backpacks
----> http://www.adafruit.com/products/
----> http://www.adafruit.com/products/
These displays use I2C to communicate, 2 pins are required to
interface. There are multiple selectable I2C addresses. For backpacks
with 2 Address Select pins: 0x70, 0x71, 0x72 or 0x73. For backpacks
with 3 Address Select pins: 0x70 thru 0x77
Adafruit invests time and resources providing this open source code,
please support Adafruit and open-source hardware by purchasing
products from Adafruit!
Written by Limor Fried/Ladyada for Adafruit Industries.
MIT license, all text above must be included in any redistribution
****************************************************/
#include <Wire.h>
#include "Adafruit_LEDBackpackCom.h"
#ifndef _BV
#define _BV(bit) (1<<(bit))
#endif
#ifndef _swap_int16_t
#define _swap_int16_t(a, b) { int16_t t = a; a = b; b = t; }
#endif
void Adafruit_LEDBackpack::setBrightness(uint8_t b) {
if (b > 15) b = 15;
Wire.beginTransmission(i2c_addr);
Wire.write(HT16K33_CMD_BRIGHTNESS | b);
Wire.endTransmission();
}
void Adafruit_LEDBackpack::blinkRate(uint8_t b) {
Wire.beginTransmission(i2c_addr);
if (b > 3) b = 0; // turn off if not sure
Wire.write(HT16K33_BLINK_CMD | HT16K33_BLINK_DISPLAYON | (b << 1));
Wire.endTransmission();
}
Adafruit_LEDBackpack::Adafruit_LEDBackpack(void) {
}
void Adafruit_LEDBackpack::begin(uint8_t _addr = 0x70) {
i2c_addr = _addr;
Wire.begin();
Wire.beginTransmission(i2c_addr);
Wire.write(0x21); // turn on oscillator
Wire.endTransmission();
blinkRate(HT16K33_BLINK_OFF);
setBrightness(15); // max brightness
}
void Adafruit_LEDBackpack::writeDisplay(void) {
Wire.beginTransmission(i2c_addr);
Wire.write((uint8_t)0x00); // start at address $00
for (uint8_t i=0; i<8; i++) {
Wire.write(displaybuffer[i] & 0xFF);
Wire.write(displaybuffer[i] >> 8);
}
Wire.endTransmission();
}
void Adafruit_LEDBackpack::clear(void) {
for (uint8_t i=0; i<8; i++) {
displaybuffer[i] = 0;
}
}
Adafruit_8x8matrix::Adafruit_8x8matrix(void) {
}
void Adafruit_8x8matrix::drawPixel(int16_t x, int16_t y, uint16_t color, uint8_t a) {
if ((y < 0) || (y >= 8)) return;
if ((x < 0) || (x >= 8)) return;
// check rotation, move pixel around if necessary
switch (a) {
case 1:
_swap_int16_t(x, y);
x = 8 - x - 1;
break;
case 2:
x = 8 - x - 1;
y = 8 - y - 1;
break;
case 3:
_swap_int16_t(x, y);
y = 8 - y - 1;
break;
}
// wrap around the x
x += 7;
x %= 8;
if (color) {
displaybuffer[y] |= 1 << x;
} else {
displaybuffer[y] &= ~(1 << x);
}
}
void Adafruit_8x8matrix::drawLine(int16_t x0, int16_t y0, int16_t x1, int16_t y1, uint16_t color) {
int16_t steep = abs(y1 - y0) > abs(x1 - x0);
if (steep) {
_swap_int16_t(x0, y0);
_swap_int16_t(x1, y1);
}
if (x0 > x1) {
_swap_int16_t(x0, x1);
_swap_int16_t(y0, y1);
}
int16_t dx, dy;
dx = x1 - x0;
dy = abs(y1 - y0);
int16_t err = dx / 2;
int16_t ystep;
if (y0 < y1) {
ystep = 1;
} else {
ystep = -1;
}
for (; x0<=x1; x0++) {
if (steep) {
drawPixel(y0, x0, color, 0);
} else {
drawPixel(x0, y0, color, 0);
}
err -= dy;
if (err < 0) {
y0 += ystep;
err += dx;
}
}
}
Adafruit_LEDBackpackCom.h
/***************************************************

  This is a library for our I2C LED Backpacks
Designed specifically to work with the Adafruit LED Matrix backpacks
----> http://www.adafruit.com/products/
----> http://www.adafruit.com/products/
These displays use I2C to communicate, 2 pins are required to
interface. There are multiple selectable I2C addresses. For backpacks
with 2 Address Select pins: 0x70, 0x71, 0x72 or 0x73. For backpacks
with 3 Address Select pins: 0x70 thru 0x77
Adafruit invests time and resources providing this open source code,
please support Adafruit and open-source hardware by purchasing
products from Adafruit!
Written by Limor Fried/Ladyada for Adafruit Industries.
MIT license, all text above must be included in any redistribution
****************************************************/
#ifndef Adafruit_LEDBackpack_h
#define Adafruit_LEDBackpack_h
#if (ARDUINO >= 100)
#include "Arduino.h"
#else
#include "WProgram.h"
#endif
#include <Wire.h>
#define LED_ON 1
#define LED_OFF 0
#define LED_RED 1
#define LED_YELLOW 2
#define LED_GREEN 3
#define HT16K33_BLINK_CMD 0x80
#define HT16K33_BLINK_DISPLAYON 0x01
#define HT16K33_BLINK_OFF 0
#define HT16K33_BLINK_2HZ 1
#define HT16K33_BLINK_1HZ 2
#define HT16K33_BLINK_HALFHZ 3
#define HT16K33_CMD_BRIGHTNESS 0xE0
#define SEVENSEG_DIGITS 5
// this is the raw HT16K33 controller
class Adafruit_LEDBackpack {
public:
Adafruit_LEDBackpack(void);
void begin(uint8_t _addr);
void setBrightness(uint8_t b);
void blinkRate(uint8_t b);
void writeDisplay(void);
void clear(void);
uint16_t displaybuffer[8];
void init(uint8_t a);
protected:
uint8_t i2c_addr;
};
class Adafruit_8x8matrix : public Adafruit_LEDBackpack{
public:
Adafruit_8x8matrix(void);
void drawLine(int16_t x0, int16_t y0, int16_t x1, int16_t y1, uint16_t color);
void drawPixel(int16_t x, int16_t y, uint16_t color, uint8_t dir);
private:
};
#endif // Adafruit_LEDBackpack_h
Source Material

