Limbi Generation #2 Fall 2019
Limbi: 3D Print Materials
Author/s:
Alondra Vivas
Edward Villanueva
Table of Contents
Introduction
As we designed Limbi, we found one of the greater difficulties, was trying to pick a material to print both the cubic modules and Limbi itself. As both objects have different functions and differing press-fit designs/snap-fit designs, as well as thicknesses and amounts of material used, we needed to analyze and record the various prices, uses, and print times as well as other aspects of the innovation space itself. This allowed us to create a version of Limbi and the cubic modules, that were best suited for their purposes. The following post outlines the discoveries we made and is intended to function as a guide for using the innovation space and as a guide for 3D printing in general.
Innovation Space Center
The innovation space center in the CSULB library was chosen for our location of printing for the following reasons:
- Inexpensive access to expensive and high-quality printers.
- 70% discount on printing for CSULB students.
- In-depth software for correcting 3D models and specifying print parameters.
- Quick print time (usually 1-2 business day turnaround) and convenience of being able to acquire prints on campus.
Materials
The following is a list of the materials we tested with the results and our analysis of each. Directly Below is a table showing the different pros and cons of the materials we tested in the innovation space by the printers they provide.
Note: the print speed, cost and Resolution are a result of the printers available at the innovation space and may change if printed at a different location or with different printers.
| Material | Strength | Cost | Slickness | Flexability | Ease of removal of supports | Print speed | Resolution |
| Onyx | High | High | Medium | Mediun | Low | High | High |
| Nylon | Low | Medium | Medium | High | Low | High | Medium |
| ABS | Medium | Medium | High | Low | High | Low | High |
| PLA | High | Low | Low | Low | High | High | Low |
ABS
ABS is a type of plastic that is produced with dissoluble supports, allowing much of the cleanup work to be taken care of automatically by the people in charge of the innovation space. It is a much less inexpensive material than Onyx and after being dissolved in an acetone bath, it is left with a smooth glossy surface that has noticeably less friction than onyx, while remaining high quality, but it is unfortunately very brittle in thinner prints.
Below is the picture of the print in ABS of limbs 0 and 4. As it can be seen, the limb hasn’t been printed right as the angle in the triangular truss design the angle is too sloped in order for the printer to properly print the material. This resulted in it coming out very jagged-like with excess filament around the edges even after the acetone bath.
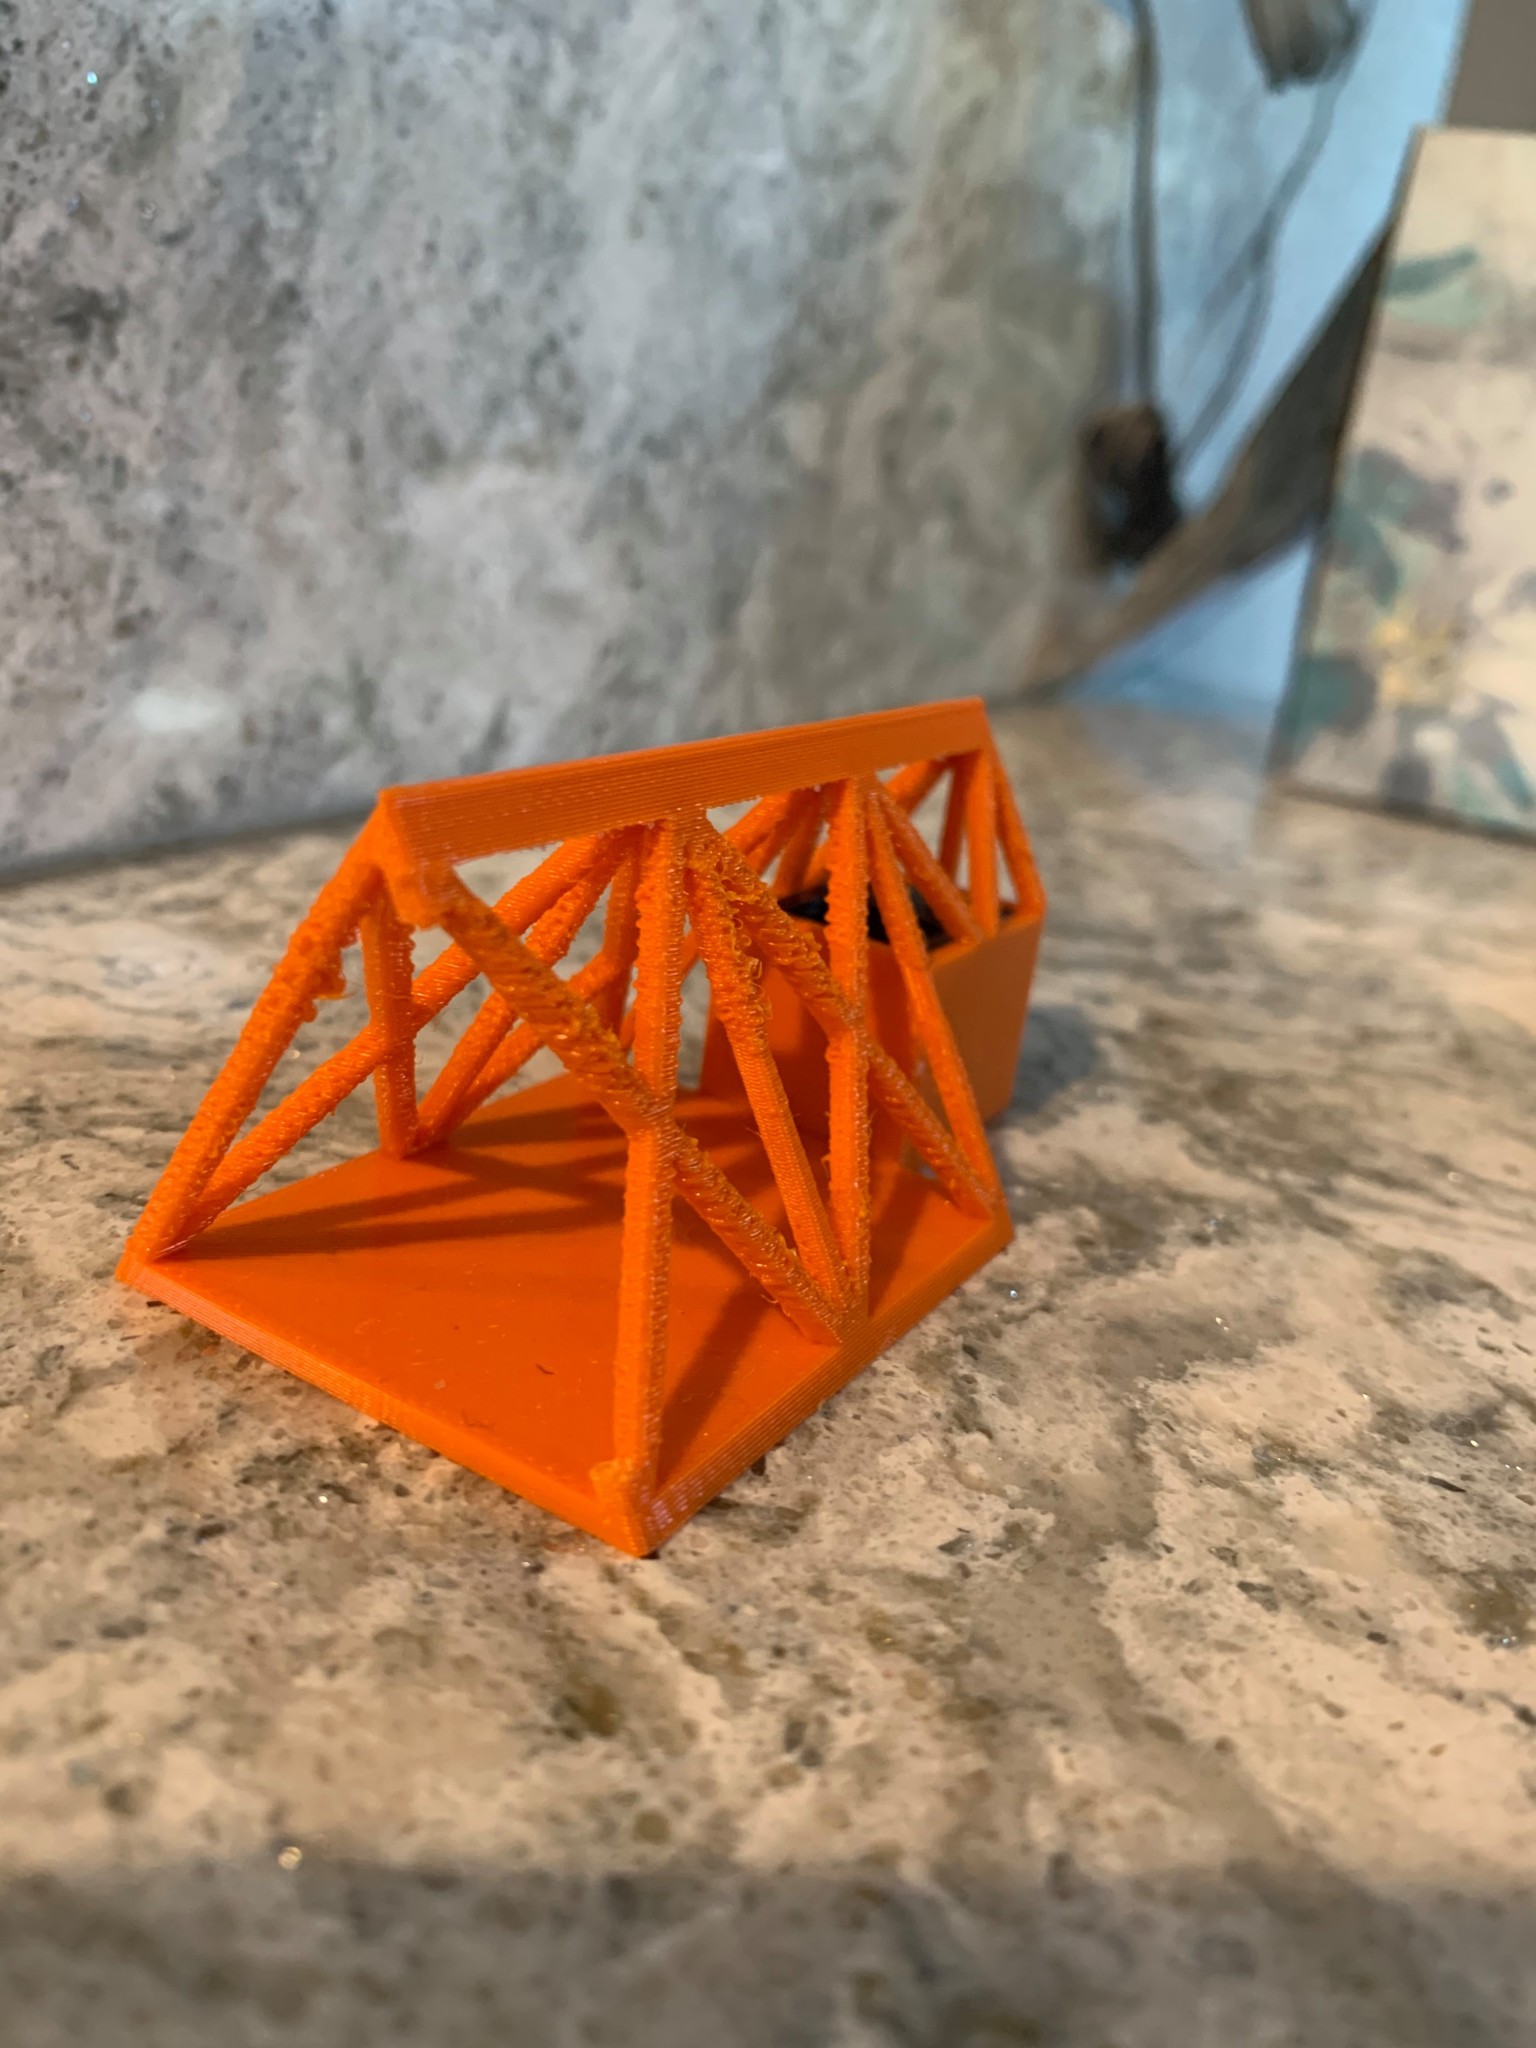
Figure 1. ABS print of limbs 0 and 4
PLA
PLA was chosen as a material to use since it’s inexpensive and we were also curious about experimenting with it as we wanted to know its capabilities in doing finer detailed prints. Unfortunately, we found this material to be rather troublesome and to come out messy with the printers provided at the innovation space, as a shaft hole of 3 mm diameter proved to come out very deformed during the printing process. This led us to believe that PLA, despite its low price, is not a favorable choice for the intricacies that we have within our 3D models, leaving us to stick to either ABS or ONYX for the remaining prints. We believe this material would suffice in larger models with less detail, where the importance of the print lies in its rigidity and strength, this is where the material would likely outperform ABS.
The image below shows the cubic module we printed in PLA. As it can be seen, the print came out deformed during the printing process which is noticeable on the sides of the module.

Figure 2. PLA module print
Onyx
ONYX is a proprietary material that takes the malleability of nylon and infuses it with carbon fiber particles to give it the strength of aluminum while still retaining its lightweight properties. In addition to this, the MarkForged printers that are necessary to print this material, allow for very precise details to print during the process. Also, the material prints at a relatively quick speed, due to the optimization that the printer itself has gone through. This is why ONYX was our material of choice, with the only downfalls being that it is not as slippery as ABS is, making rotating parts slightly rougher to move, and the price point of ONYX is rather expensive even with the discounted prices provided by the innovation space. However, because it can produce near injection molded looking prints, it is highly recommended to use ONYX prints on a MarkForged printer, whenever possible. For further knowledge, the printer used at the library is $3500, due to this high price for a 3D printer there is only 1 other place in both L.A and Orange County that has the same printer.
The picture shown is one of the examples of the Onyx prints we printed. It shows the limb for limb 0 and 4. It can be seen how much sleeker the material is compared to the other materials mentioned on this blog post.

Figure 3. Onyx print of limbs 0 and 4
Nylon
Nylon was tested during the second iteration of our cubic module. It was similar in nature to onyx (as onyx is carbon fiber embedded in nylon) however it was vastly inferior to onyx in many ways while still retaining a fairly high price point. This material does not have a dissoluble support and it prints poorly when the wall thickness of your model is about 1.5mm. Therefore if using this material, it is important that the thickness of the walls exceeds 2 mm at least. This material proves to serve well for any flexible parts as it has the greatest amount of flexibility from all the materials listed, however it does not serve well for smaller, or more detailed prints.
Below is the picture of the Nylon print of the bottom joint. The circle in the center of the bottom joint came out poorly as this material doesn’t do well with printing small objects. Our measurements were correct, however, the print still came out too large for the joints within Limbi and the press fit for the shaft came incorrectly.

Figure 4. Nylon print of the bottom joints
Rapid Prototyping
This section analyses the rapid prototyping of the connectors, the cubic modules, and Limbi. The purpose of this discussion is to compare the materials to the designs side-by-side.
Connectors
The image below is the rapid prototyping we have accomplished for the connectors.
- The one on the left was our first iteration and very first 3D print for this project. It was printed in ABS. Problem encountered was the large size.
- The second one from the left was our second iteration. It was printed in Onyx. Problem encountered was the middle ring.
- The middle connector was our third iteration. It was printed in nylon. Problem encountered was that the material was too bendy, and the shaft housing was too large
- The last 2 connectors were our fourth and fifth iteration, respectively from left to right. The last connector was made from ABS the fourth one from Onyx. They were printed at similar time. We are going to go with the Onyx connector.
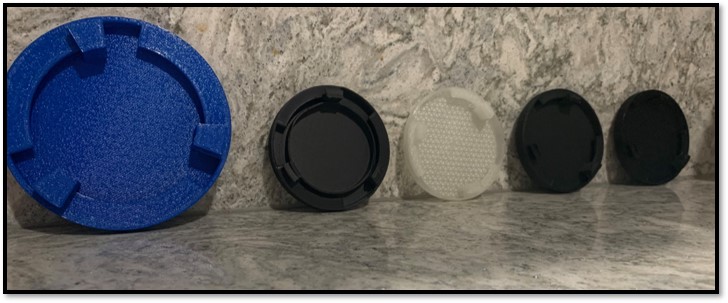
Figure 5. Connectors side-by-side Comparison
Cubic Modules
The image below contains the picture of the several iterations of the cubic modules.
- The first iteration of the cubic modules is not pictured above because it was misplaced. It was printed in Onyx and did not contain the press fit housing for the motors.
- The module on the left was our second iteration which was used for our v1 demo. It was printed in Nylon to save money and time; however, it was printed poorly.
- The second module from the left was our third iteration. It was printed in ABS. It lacked the press fit housing for the modular contacts
- The third and fourth modules are our fourth and fifth iteration, the only difference between the two being that the fourth iteration is in onyx while the fifth is in abs.
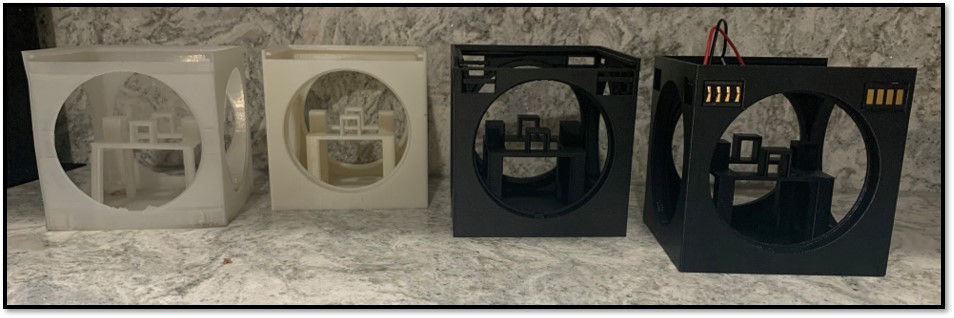
Figure 6. Cubic Modules side-by-side Comparison
Limbi
This section analyses the two separate Limbi prints we had during this semester. We used two seperate prints which were ABS and Onyx. In the end, for the final version version of Limbi we went with an Onyx print for reasons talked about below.
Limbi V1
- Limbi V1 utilized a triangular truss design.
- It was printed in ABS.
- A problem encountered with the triangular truss design was that the 3D printer had an issue with the angles which caused a poor print also the 3Dot couldn’t fit.
- We then printed out the the same design in Onyx and it came out better than the ABS print but there were still issues with the angles.
- The color was chosen as orange in order to get into the Halloween spirit since our demo was in October.
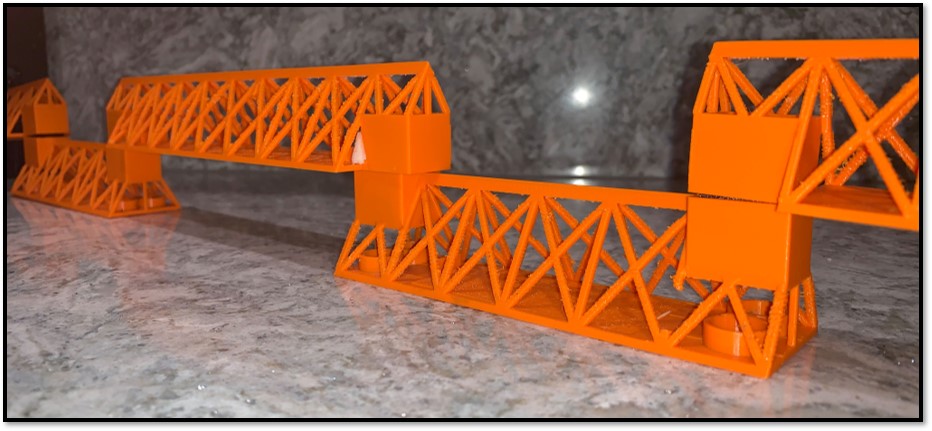
Figure 7. Limbi V1
Limbi V2
- Limbi V2 was printed in Onyx which gave it a sleeker look.
- We switched the design from a triangle to a rectangle so that all the components could fit within Limbi with ease.
- This design also allows for better cable management as there is much more space available to for wiring and connections to be made.
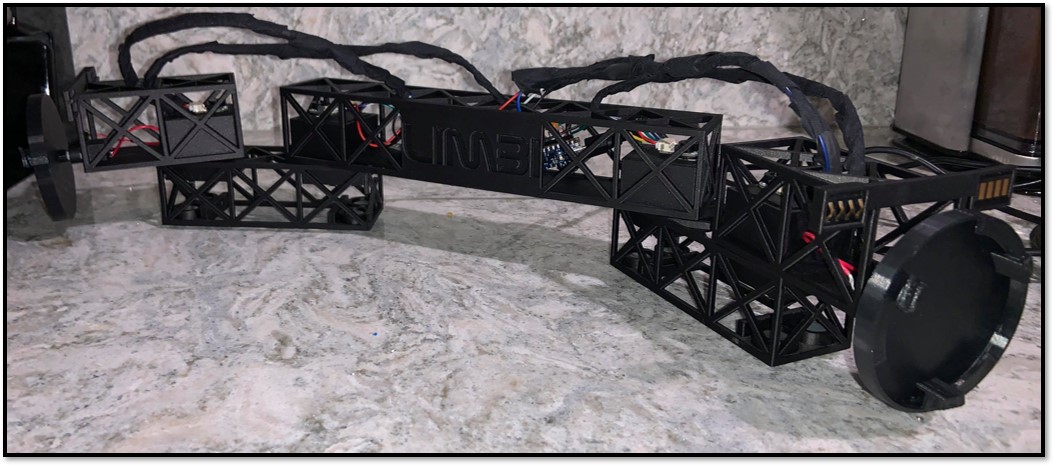
Figure 8. Limbi V2
Prices
The prices of each material in the innovation space, appear to be as follows (As of 12/3/2019):
- ABS: $1.00 / per 13.9cm^3
- PLA: $1.00 / per 30cm^3
- ONYX: $1.00 / per 8.5cm^3
- NYLON: $1:00 /per 9.5cm^3
NOTE: there is a standard $5.00 minimum fee for every purchase, therefore even if the amount of material is less than $5.00 as listed in the costs above, you will still be charged $5.00
Schedule
The innovation space center seems to be capable of delivering prints in about two days after the print has been ordered, during the beginning of the semester. Near the middle of the semester, it seems the number of prints drastically increase and the prints result in taking about a week to a week in a half near the end of the semester. This process can be expedited however, if you send the innovation space an email shortly after sending your print in, and specify that the print is for a senior design course (while listing the professor and class number). Usually this will put your print further up in their queue, above recreational prints. This has proven to be the case multiple times in our experience.
How to Place an Order
An order within the innovation space is easy to place, and the majority of the printing process is taken care of for you through the innovations space. If printing in ABS, the supports are dissolved for you, and all prints have automatic supports placed on them where needed. To place an order you must first sign into fab pilot website, using your CSULB credentials. then upload the STL file containing the model, and pick the material you want to print the object in, and purchase the print. Other options such as manual support placement, and tools are available before printing, but the main process takes a matter of minutes.
What Files to Upload
The files needed to be uploaded to the fabpilot website should be STL files, where the
The quantity of the files change the price, as uploading more files would be more expensive than uploading a single one, especially if the amount of material needed is smaller than the cap of 5 dollars (see above printing prices for more details on 5 dollar cap). Essentially, you want to get as much printed on one print bed as possible, as this also allows you to print more without having to take up multiple printers, delaying your own print as well as others. In order to do this you must arrange your 3D models into one file, so that the end result is one large STL file (or obj) containing as many 3D models as possible, while still being restricted to the size of the print bed you are using.
NOTE: different materials use different printers, as a result their print bed sizes vary, with the onyx printer being rather small.
The email for the innovation space is as follows: i-space@csulb.edu.