Prototype: Fritzing and Breadboarding – Spring 2016
Posted by: Luis Valdivia(Project Manager)
Written by: Kevin Nguyen(Electronics and Controls)
Table of Contents:
- Introduction
- Fritzing
- Breadboarding
- Protoboarding
Introduction:
It is important to prototype the schematic before sending it to the fab house. This is to ensure that the PCB would work the first time since PCB fabrication takes a lot of time and money.
Fritzing:
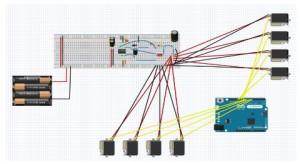
To start, a fritzing diagram is drawn on the Fritzing software. The Fritzing software allows us to draw out the connections of the physical components. This makes it easy to see where every component goes.
Fig 1.1 Fritzing Diagram
Breadboarding:
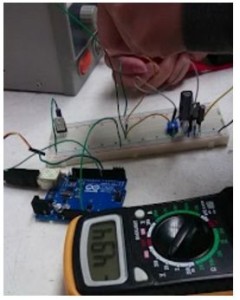
After finishing the fritzing, the circuit can be implemented onto a breadboard. Since the servo driver on our PCB does not come in through-hole packages it cannot be inserted into the breadboard. Once the buck converter is fully connected with all the supporting components, it must be tested for proper functionality. A power supply was used to test the breadboard. Setting the power supply to 14.8V to simulate the LiPo battery, we were able to acquire a 4.94V output.
Fig 1.2 Testing the Buck Converter
Protoboarding:
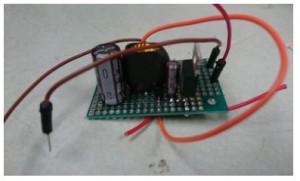
Once the circuit is verified to be working. The components are transferred onto a protoboard to make things more compact and easy to use. The protoboard could be mounted onto the quad to be used for testing while waiting for the PCB to come in.
Fig 1.3 Protoboard
Conclusion:
The circuit schematic must be prototyped to make sure the circuit works before sending it off to be fabricated. The prototyping process for the circuit schematic includes fritzing, breadboarding, and protoboarding. This gives the extra benefit of being able to use the prototype while waiting for the PCB. These extra steps are needed to save time and money.

