Simple control of Arduino using Arxterra
By Vinh-Khoa Ton, Control and Image Processing
The purpose of this experiment is to access the Arxterra control panel and to operate an Arduino board using the Microbridge connection through an Android phone.
For information about the Microbridge connection between Android and Arduino, please visit this blog post:
https://www.arxterra.com/simple-control-of-an-arduino using-an Android-phone/
A quick demonstration:
https://www.youtube.com/watch?v=D_rMULcm6uc&feature=youtu.be
How to set it up:
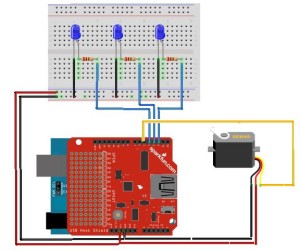
Use the schematic
The LEDs are on pins 2, 3, and 4 and the servo is on pin 5. The USB Host Shield v2.0 was needed for communication between the Android phone and the Arduino Duemilanove ATMega328.
Upload the Arduino code to the board (provided at the end of this post).
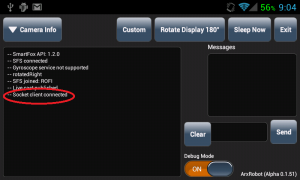
Open the ArxRobot app on Android phone and set up the connection with Arxterra, use the Microbridge connection type (for detail instructions please see Tommy’s powerpoint here:
http://csulb.edu/~hill/ee400d/Lectures/12_Arxterra%20Login.pptx)
Connect the Android and Arduino using a micro-USB cable (the app should have a command “socket client connected”)
In this example I created 3 custom commands (3 switches) to control 3 LEDs.
Log-in to Arxterra using the same credential that was used to connect to ArxRobot app.
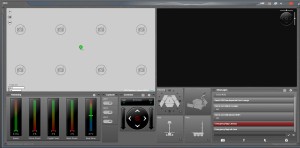
Go to the control panel:
At this point, the connection should be established. If we move a LED switch, the corresponding LED should turn on/off accordingly. If we hit a move button, the servo should respond accordingly.
Conclusion:
This experiment serves an important part in building a solid foundation for the final connection between our robot and Arxterra. After we successfully grasp the concepts of the communication between Android and Arduino, we can proceed to replace the move servo function with more complex movements to suit our need. The only limitation of what it could do is our imagination.
Arduino Code:
https://github.com/kh0/Spring-2014-ROFIA/blob/master/ROFIACode/ArduinoControlWithArxterra


