Spring 2016 3D SMD: Z-Axis Rapid Prototype
By Henry Nguyen (Electronics and Control)
Table of Contents
Introduction
For our Z-Axis, we purchased a Thread Drive Pack from Makeblock which is able to move our thread drive beam up and down with great precision. This kit came with a DC Motor; however, for our uses, we found that using a stepper motor will be more convenient and easier to control with the current software we are using. By using a stepper motor, we are able to move our Z-Axis up and down with speed and precision. Our issue is attaching a stepper motor to our thread drive pack.
Implementation
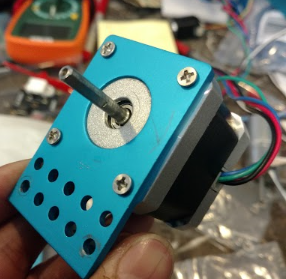
For our rapid prototyping, we will be using our X-Axis stepper motor, Me stepper driver, and our stepper motor bracket. I was able to utilize an extra bracket that came with our thread drive pack in order attach our Me stepper driver.
Figure 1. X-Axis Bracket
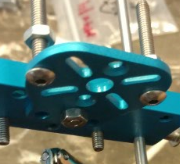
Figure 2. Extra Bracket
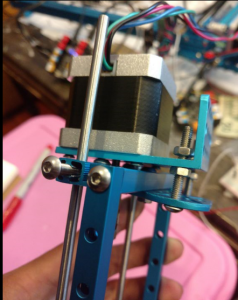
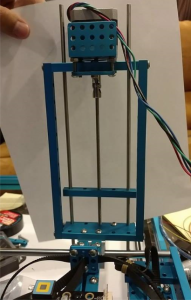
By connecting the extra bracket into our thread drive pack, I was able to utilize the two screws shown in Figure 2 to attach to our X-Axis bracket. The following image shows the stepper motor completely attached to our thread drive kit.
Figure 3. Installed Stepper Motor onto Z-Axis
Problems
When attaching the stepper motor shaft through the hole provided, I noticed that it was not completely straight. The shaft was slightly crooked due to the screws that are being attached to the brackets. This caused problems when running our stepper motor causing it to stall. By adjusting the nuts shown in Figure 3, I was able to straighten out the bracket so it became slightly more parallel to the surface.
Results
In order to test our stepper motor, we used the same code provided from our X-Axis stepper motors. We are able to use our X-axis because our stepper motor and me stepper driver came from our X-axis for this rapid prototyping. By inserting our Gcode values of X0 and X50, we were able to move at a measured distance of 0.3 inches. An example is shown in the Youtube video provided below.
https://www.youtube.com/watch?v=mQ80G-T7yP4
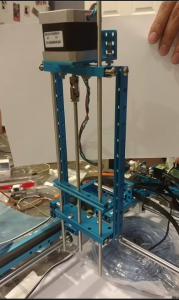
Figure 4. Z-Axis Front View
Figure 5. Z-Axis Back View
Conclusion
Overall this rapid prototyping is a success. We are able to control our Z-axis thread drive kit with a stepper motor with great speed and precision all whilst being compatible with our current software. It is very easy to manipulate the distance our thread beam can move by inputting various Gcode values. I used X0 and X50 because it was able to move our 0.3 inches. Our reel feeder height is 0.17 inches. By moving 0.3 inches, it will be able to clear our reel feeder with extra space to spare. More testing will need to be done to see exactly the distance needed for our Z-axis to clear any obstacles. We will be using the shortest distance possible to increase our speed. This rapid prototyping also allowed me to visualize the design of the bracket that we will be creating in order to better fit a stepper motor onto our thread drive kit.

