Spring 2016 A-TeChToP Final Hardware Design
By: Mimy Ho (Manufacturing Engineer)
Introduction
Up to this point, we have the 3D printed case, completed and working PCB, and the battery that we finalized that we use for the Central Sensor Suite. So, we are moving forward to the next step of the project is to assemble our final product. This blog post will explain in detail how the material is chosen for the strap, what kind of wires will be used and how to attach the sensors to the strap.
Table of Contents
Level 2 requirement #16: The wearable device will avoid using materials that can lead to skin irritants caused by an allergic reaction
Chest Harness Material
Neoprene was chosen because its characteristics: water resistance, temperature controlling and flexible which makes it a best suit material for our device. Also, the fabric is stretchable, but it does not go out of the shape. So it can be used to fit a child from 5 to 13 years old. The material is also used for many rehabilitation purposes, such as thumb stabilizer, orthopedic supports (1)
http://www.stomatex.com/breathable-neoprene-fabrics.html
The fabric was purchased from ebay. The link is provided below: http://www.ebay.com/itm/Neoprene-Scuba-Knit-Fabric-Polyester-Spandex-Sold-BTY-58-Wide-All-Colors-/181968160857?var=&hash=item2a5e25c859:m:mygeesf-jgfGXmg_c6f5PXg
Wiring
Silicon Cover Stranded Core Wire 26AWG with the outer diameter of 1.5mm was chosen for our device. The wire is designed for wearable device. It is super-flexible, soft but it strong. So it will be able to deal with a lot of bending which easy for attaching to the chest harness. The wires are purchased from the adafruit website.
https://www.adafruit.com/products/1881
Snap on Buttons for Electrodes
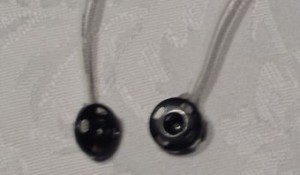
The female snap on buttons sew directly to the strap and snap in the back of the 3M electrode. We use size 3 snap on buttons which can be purchased at local fabric shop.
https://www.sparkfun.com/products/11347
Figure 1: Snap on buttons are used for electrodes
Ear Clip for the Blood Oximeter
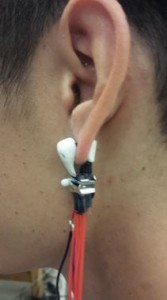
We use clay and clip on earring to make the prototype for attaching the blood oximeter to the ear. One side of the clip holds the LED and the IR LEDs, on the opposite side holds the blood oximeter sensor. The purpose of the clip on earrings is to make sure it will stay still on the ear and create the comfort for a child while playing. The wires are sewed into the chest strap, so it will not interfere a child from any physical activities.
Figure 2: Prototype for the blood oximeter
Figure 3: The blood oximeter attaches to an ear lobe
Temperature Sensor
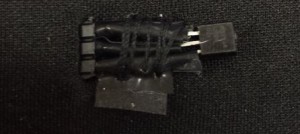
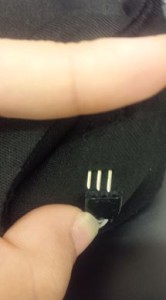
The temperature sensor will be sewed directly to the strap (Figure 4), the 3 pins of the sensor will go through the fabric and connect to the header on the other side of the strap (Figure 5)
Figure 4: Temperature Sensor attaches to the strap
Figure 5: The pins of the temperature sensor connects to the header
Conclusion
The material of the device was carefully chosen based on the level 2 requirement 16 which to make sure that it will not cause any skin reaction for a child. Also, when attaching the wires to the strap, need to make sure that it will not prevent a child from any physical activities.


