Spring 2016 A-TeChToP Temperature Sensor
Mimy Ho (Manufacturing Engineer)
Table of Contents
Introduction
The digital temperature sensor DS18B20 was selected based on the level 1 and level 2 requirements of the project: weight, accuracy, and safety. The sensor is waterproof and therefore safe for a child who sweats during play. This blog post focuses on the initial testing and implementation of the sensor.
Wiring DS18B20 and Arduino
- Connect Pin 1 of the DS18B20 to GND on the Arduino.
- Connect Pin 2 of the DS18B20 to Pin 2 of digital output on the Arduino.
- Connect Pin 3 of the DS18B20 to 5V on the Arduino Uno.
- The pull-up 4.7kΩ resistor adds between Pin 2 and Pin 3 of the DS18B20.
The picture below shows how the sensor connects to the Arduino Uno:
Testing
To generate the code for the sensor, the “One Wire” library” was added to the code. The source code was found in the reference link.
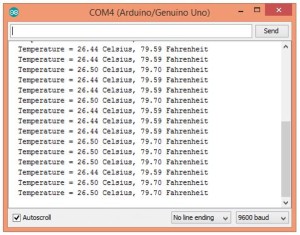
Below is the result that was collected from the room temperature displayed on the serial monitor window:
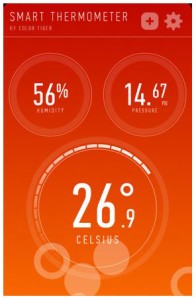
The “Smart Thermometer” apps from an Android phone were used to obtain room temperature and to compare the result with the ones collected from the DS18B20 sensor:
Conclusion
The temperature sensor and the app obtained approximately the same values, and it was determined that the sensor was working correctly. The next step is to place the temperature sensor under the armpit and compare the results with the results from a digital thermometer. The sensor also will be tested on the Arduino Pro Mini and the PCB.
Reference
http://playground.arduino.cc/Learning/OneWire


