Spring 2016 AdBot Critical Design Review
The Rover should travel on level area, ramp area, and stair ways during the mission test.
Critical Design Review
By Dang Le, Project Manager
- Dang Le (Project Manager)
- Don Tran (System Engineer)
- Muhammad Ali Siddiqui (Electronic Engineer)
- Muhammad Maqbool (Manufacturing Engineer)
Executive Summary
Program Objective/Mission Profile
Program Objective
The project objective is to build a rover that will simulate a flyer distributor advertising CSULB’s Eta Kappa Nu social, guest speaker, and technical events on campus. Using a single power source the rover will launch from, and return to, an HKN advertisement booth and run in a general high foot-traffic area on campus which consists of flat areas, sloping areas, and stair ways, as shown in the course map. The rover will be controlled remotely using a computer with internet connection. Negotiations of budget resulted in the rover to cost less than or equal to $250. There is to be expected 0 to 16 mph wind during the course run on May 13th (Reported in Weather Report).
Mission Profile
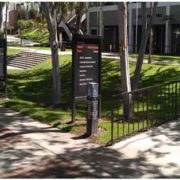
The total distance is approximated in 344fts. The perimeter of the grass is 275 ft / 84 m. The north and south sides are leveled. The east side has 9 steps. The west end is a ramp.
The front of USU building
The Design
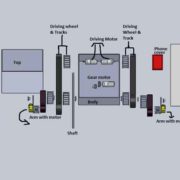
The main component in our rover design are including
- Four drive motors (2 on the front and 2 on the back).
- One gearbox motor (for the center).
- Six wheels and tracks.
- Two arms with supported by horizontal shaft and gear.
- Pole holder for advertising and smart phone.
Project Features
- Rover with advertising sign will be traveled up stairs and slope area in front of USU building.
- Rover will be run and return to HKN advertisement booth in a single charge.
- One shaft with high torque gear box motor to support the lifting arms weight during the stair climbing.
- Operator will be controlled remotely using Arxterra application with computer wifi connection.
- Innovative wheels design to have a better track grip.
- New aerodynamic body design to reduce weight and wind resistance
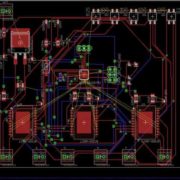
Custom PCB Design
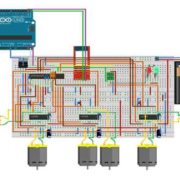
Fritzing diagram circuit with three H-bridge and I2C protocol IC to drive five motors with using Arduino and firmware coding.
Fritzing Diagram
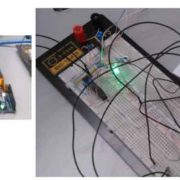
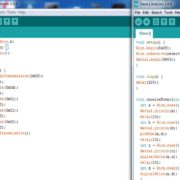
Breadboard testing transmit and received data with using H-bridge IC circuit and Arduino coding.
PCB layout
Hardware Design
By Muhammad Maqbool, Manufacturing Engineer
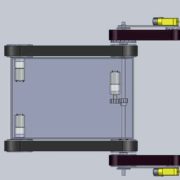
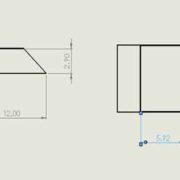
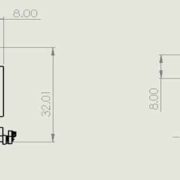
The body of our AdBot is set to be 12” x 8” x 2”. The Body is made of Aluminum. I got separate sheets of Aluminum each with a thickness of 0.125 inch and I welded them together with the help Ryland Walts. The reason for choosing Aluminum is that for our AdBot we wanted a strong body that would not get damaged if our AdBot hits the stairs or anyone try to kick it.
The body consist of two holes in the back each of a diameter of 0.16 inches, the holes provide a path for the driving motors to directly connect with the wheel. The two holes in the front of the body provides a path for the shaft to pass through and will be connected to the free moving wheels and arms.
The wheels are printed using ABS plastic. ABS plastic is the most cost effective material. Each Wheel has a diameter of 2.5 inches and a thickness of 0.7 inch. The arms of the our AdBot will be of Aluminum as wheel, the arms will be 6” x 1” with a thickness of 0.125 inch. We have two motors in the front of the arm that will be driving the front wheels at all times. I have designed the gear for the shaft and the motor myself. As the motor rotates the gear on it rotates with it hence rotating the gear on the shaft and lifting the arms. I have designed two arm holder myself that will hold the arm on the shaft at all times.
The top of our AdBot is more aerodynamic by adding curves to it so it can go fast. The top is 12” x 8” and will sit on the body and I will screw them both. I will design a pole holder that will hold our pole hence holding our sign.
Software Design
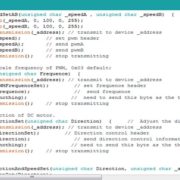
Test code for controlling motors with Arxterra Application
Project Update
By Dang Le, Project Manager
Work Breakdown Structure (WBS)
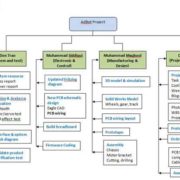
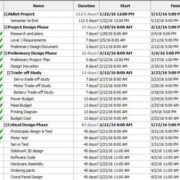
As a project manager, who created and assigned tasks for each member within the team throughout the project. A work breakdown structure (WBS) that showed each of team member who had responsible for their tasks. There could be a change during the mission task depend who has more free time and ability to take workload from other member. Here is our delegation tasks that showed in display below.
Budget Report updated
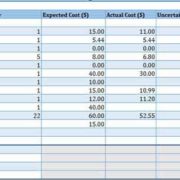
As a Project manager, I have to keep track on our budget to make sure it still within our given budget. The most expense is on prototype component and chassis. Unfortunately, our rover were bigger compare to previous semester, thus we have to look for the difference type of tracks that can support our rover during the mission test course. First, we thought we could use 6V DC motor for our rover ( these motor are free from previous semester), but now due to the rover is too heavy and may not be able to travel on stair ways and long distance, so we may replaced with 12V DC motor for final demo. Our budget report with expected cost right now without five of 12 V DC motors is $220.44.
Schedule Updated
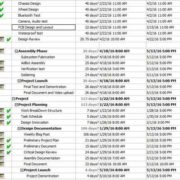
Project schedule is the software that used to create a task schedule and plan in this project for a specific date to be completed. As the project moved on, we could see which tasks we were completed or behind the schedule. The schedule showed in green check mark that indicated these tasks were completed. However, the main concern was the PCB schematic and PCB wiring layout. We have built a new schematic, which more complicated than our thought due to more parts on PCB and not enough clearance between one trace to another, thus our team member were having so much trouble when doing the layout. Furthermore, we were down by one of our team member electronic engineer. Thus, we were behind the schedule as our planned. Another issue was main tracks for our rover. The current track we have as the same last semester that was not support enough for our rover during the mission test. We are still looking for the tank track and 12 V DC motor with high torque for our AdBot.
Status and Percent Complete
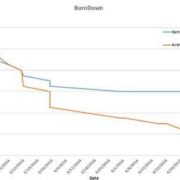
Here is the status and percent burn down as we move along until this time. The charts showed that we were behind on software coding, PCB layout, and hardware as well.
Project Demonstrations
click the link below to watch the AdBot demonstration
https://www.youtube.com/watch?v=CX5fDNFeUjc

