Spring 2016 Pathfinder: LED Headlights
by:
Juan Acosta (Electronics & Control – MCU Subsystem & Firmware)
Table of Contents
Introduction:
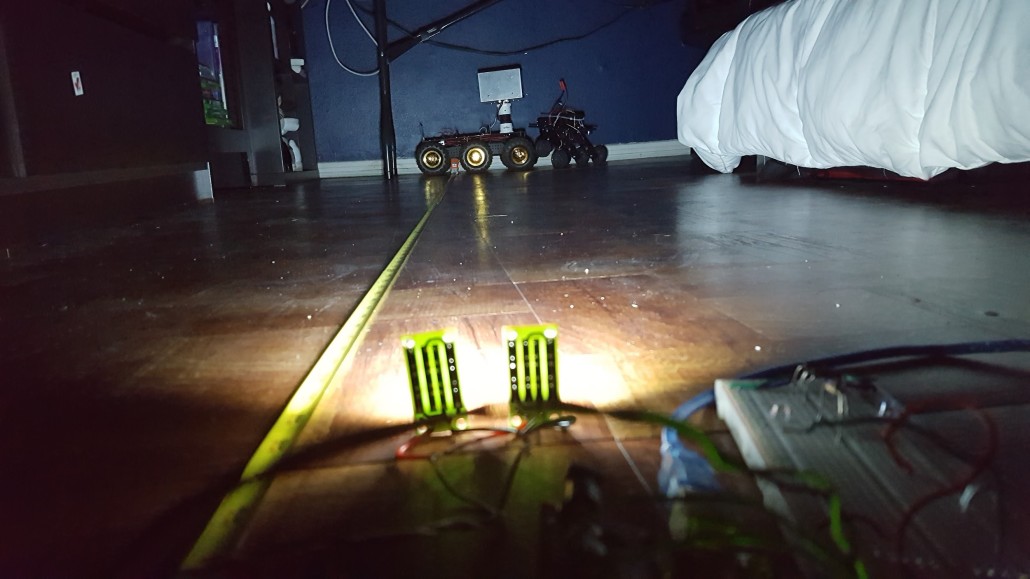
One of our requirements is to have the Pathfinder explore the CSULB campus at night. In order for us to accomplish this objective, we will need a way of maintaining a visible line of sight for the Tango Tablet and Android Phone. So we decided that we would give the Pathfinder bright headlights that would allow us to see a maximum of 4 meters or about 12 feet ahead of the pathfinder.
Materials:
- HC-06 bluetooth Module
- Ar 2560 or Arduino UNO
- Jumper Wirduino MEGAes (4)
- 6 Piranha 5V Led Light Panel Board White Night Lights Lamp Super Bright (2)
- Laptop with Coolterm application
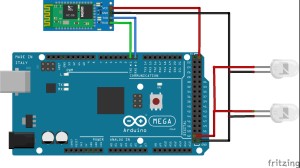
Fritzing Schematic and Steps:
- Wire GND of the HC-06 to GND on the arduino
- Wire VCC of the HC-06 to 5V on the arduino
- Wire RXD of the HC-06 to TX0 on the arduino
- Wire TXD of the HC-06 to RX0 on the arduino
- Wire 5V of the LEDS to PIN52 on the arduino
- Wire GND of the LEDS to GND on the arduino
- Upload arduino code provided. (Notice: Be aware that the HC-06 must be unplugged while uploading code to the arduino, otherwise you may run into functionality issues.)
- Initially you will have to pair the HC-06 with the laptop through bluetooth (Password for HC-06: 0000 or 1234)
- Manually control the LEDS through Coolterm by sending a ‘0’ for off, or ‘1’ for on.
Arduino Code:
// The following code was written, tested and debugged by Juan Acosta for
// testing the LED Headlights operation using the HC-06 to implement commands
// being sent from the COOLTERM application from a laptop or phone to the arduino.
// Group: Pathfinder Spring 2016
// Electronics and Control: Juan Acosta (MCU Subsystem and Control Firmware)
///////////////////////////////////////////////////////////////////////////////
// following are connections required for HC06 module:
// connect BT module TX to RX0
// connect BT module RX to TX0
// connect BT Vcc to 5V, GND to GND
///////////////////////////////////////////////////////////////////////////////
// following are connections required for LED Headlights:
// connect 5V to Pin 52 of the arduino MEGA
// connect GND to GND
///////////////////////////////////////////////////////////////////////////////
void setup() {
pinMode(52,OUTPUT); // initialize pin 52 as output for LED Headlights
Serial.begin(9600); // set the data rate for the Serial Port
}
char a; // stores incoming character from other device (phone, tablet, or laptop)
void loop() {
if (Serial.available()){ // if text arrived in from hardware serial…
a=(Serial.read());
if (a==’1′){
digitalWrite(52,HIGH); // turn the LED Headlights on (HIGH is the voltage level)
}
if (a==’0′){
digitalWrite(52,LOW); // turn the LED Headlights off
}
if (a==’?’){
Serial.println(“Send ‘0’ to turn LED Headlights on”);
Serial.println(“Send ‘1’ to turn LED Headlights off”);
}
// you can add more “if” statements with other characters to add more commands
}
}
Video Demonstration
Conclusion:
We were able to meet the requirement of having a distance of at most 4 meters or 12 feet lit up. These LED lights will definitely help illuminate the path for the pathfinder as it traverses through CSULB at night. Even though these LED lights are super bright, they should not be relied on as the primary source of lighting aid, we are using these in conjunction with the lighting from all the lamp posts around campus. After we confirmed that the LED Headlights were working through bluetooth, we can then transfer what we applied over to arxterra so we can control the LED Headlights through the arxterra control panel through custom commands.
Sources:
LEDs:
http://www.ebay.com/itm/181941929073?_trksid=p2057872.m2749.l2649&ssPageName=STRK%3AMEBIDX%3AIT
Coolterm:
http://freeware.the-meiers.org


