Spring 2016 RoFi: Servo Testing and Centering
Christopher Andelin (Project Manager)
Mario Ramirez (Systems Engineer)
Qui Du (Manufacturing Engineer)
Andrew Laqui (Electronics and Controls Engineer)
Henry Ruff (Electronics and Controls Engineer)
Servo Testing and Centering
Henry Ruff (Electronics & Control)
Considering RoFi’s provided condition is questionable, we decided to verify that each servo was still in working condition, and able to perform in its given ranges. The servos being used are the Power HD 1501-MG, and the datasheet for which is provided below.
https://www.pololu.com/file/download/HD-1501MG.pdf?file_id=0J729
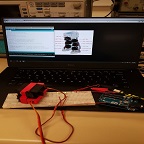
According to this datasheet, each servo has a range of motion of 165 degrees, and so for our purposes I modified the following code to sweep the servo arm in a range of 0 to 180, pause, and then sweep back from 180 to 0. This test was performed on each servo individually, using the schematic and setup provided below as well.

Image 1: Servo Test

Image 2: Servo Centering
/* Sweep
by BARRAGAN <http://barraganstudio.com>
This example code is in the public domain.
modified 8 Nov 2013
by Scott Fitzgerald
http://www.arduino.cc/en/Tutorial/Sweep
Modified By Henry Ruff
*/
#include <Servo.h>
Servo myservo; // create servo object to control a servo
// twelve servo objects can be created on most boards
int pos = 0; // variable to store the servo position
void setup() {
myservo.attach(5); // attaches the servo on pin 5 to the servo object
}
void loop() {
for (pos = 0; pos <= 180; pos += 1) { // goes from 0 degrees to 180 degrees
// in steps of 1 degree
myservo.write(pos); // tell servo to go to position in variable ‘pos’
delay(15); // waits 15ms for the servo to reach the position
}
delay(2000);
for (pos = 180; pos >= 0; pos -= 1) { // goes from 0 degrees to 180 degrees
// in steps of 1 degree
myservo.write(pos); // tell servo to go to position in variable ‘pos’
delay(15); // waits 15ms for the servo to reach the position
}
delay(2000);
}
The results of running the code for each servo is shown below. The numbers assigned to each servo was for testing purposes only, and differs from how they are actually assembled into RoFi. Servos that did not perform as expected were noted as such, and therefore set to be replaced if necessary.

Table 1: Servo Results
Modification to this code (shown below) was used to center the servos, following the method that Jonathan Dowdall outlines on his Project Biped website. Once a servo is centered by using the code, it is assembled into RoFi using the image below that is also on the website, and is then ready to be used in other steps.

Image 3: Servo Assembly Source:https://docs.google.com/presentation/d/1bLCdCVLSEdNJ1TqWfmgMjQWJXn9XuLbbaKUQzWxhx_E/edit?pref=2&pli=1#slide=id.i6
/* Sweep
by BARRAGAN <http://barraganstudio.com>
This example code is in the public domain.
modified 8 Nov 2013
by Scott Fitzgerald
http://www.arduino.cc/en/Tutorial/Sweep
*/
#include <Servo.h>
Servo myservo; // create servo object to control a servo
// twelve servo objects can be created on most boards
int pos = 0; // variable to store the servo position
void setup() {
myservo.attach(5); // attaches the servo on pin 5 to the servo object
}
void loop() {
for (pos = 0; pos <= 90; pos += 1) { // goes from 0 degrees to 180 degrees
// in steps of 1 degree
myservo.write(pos); // tell servo to go to position in variable ‘pos’
delay(15); // waits 15ms for the servo to reach the position
}
delay(20000);
}