Spring 2018 AT-ST Final Model
By: Danny Pham (Manufacturing and Design Engineer)
Verified By: Intiser Kabir (Project Manager)
Approved By: Miguel Garcia (Quality Assurance)
Introduction
After the preliminary design review presentation, we decided to steer away from the split leg option that the previous semester used because it was difficult to balance. There were many complications with the previous design that caused the robot to fail, such as the unstable design of the legs and feet. To give us some ideas, Hill let us borrow a Theo Jansen Biped kit that moved with the Theo Jansen leg design using a fan. We decided that since the kit was well balanced, we could try to incorporate the use of motors instead of a fan into the leg design of this kit in order to make a walking robot that could walk and turn.
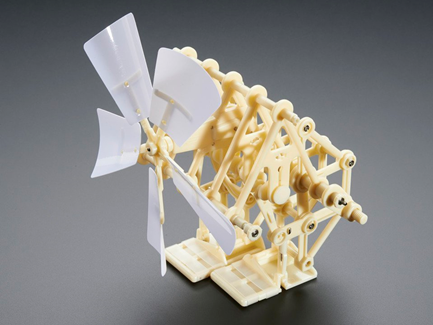
Figure 1: Theo Jansen BiPed Kit
This is the fully built Theo Jansen Biped Kit that moves by using the fan to rotate the shaft. It includes an automatic weight shifting mechanism and three gears that connect the fan and the shaft.
After building the kit, we saw that the main action that moved the kit was a fan that moved three gears in a gear system. A shaft that runs through the kit is rotated by a gear connected to the shaft. The rotating shaft moves the entire Theo Jansen kit. We modified the design of the kit so that instead of using a fan to move the kit, a motor on each leg would move each leg. First, we removed the fan and the gear attached to the fan.
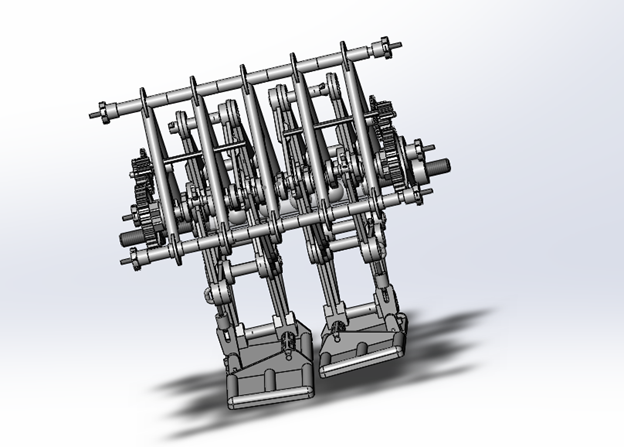
Figure 2: Theo Jansen Model on SolidWorks.
We found the entire kit on a Solidworks file on grabcad. The link is sourced below. This is an image of the kit on Solidworks after I removed the fan.
The kit above includes a rotating shaft that moves both legs simultaneously at different motions to create the walking motion. Since we are implementing a motor to do that for each leg, we split the shaft in half and implemented that on each side so that one shaft will move one leg, and the other shaft will rotate the other leg.

Figure 3: Original Rotating Shaft and the edited Shaft.
Image of the original rotating shaft and the edited shaft that is cut in half. We will be using the half shaft on each leg instead of just one shaft for both legs. Each shaft will be connected to their own motor through the gears.
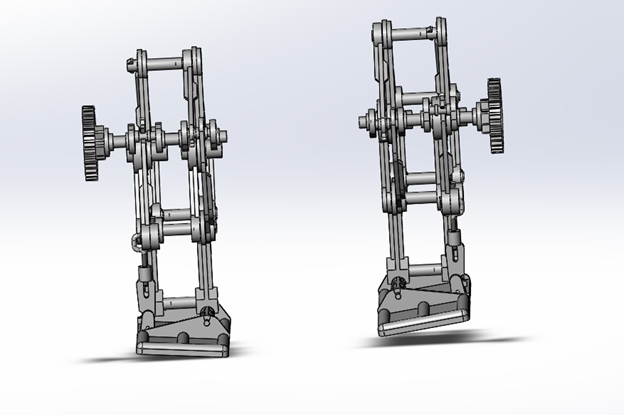
Figure 4: Leg Design on SolidWorks.
The edited rotating shafts and a gear are connected to each leg. The frame of the kit and the automatic weight shifting mechanism are removed from the model. This will be the framework of the legs.
After removing the chassis of the kit, we designed our own frame with the same concept as the kit model. The chassis will hold the rotating shaft in place while it rotates. It is also connected to the rest of the frame and will be the main anchor that holds the robot together. We added a general box on top of the frame to hold the electronics.
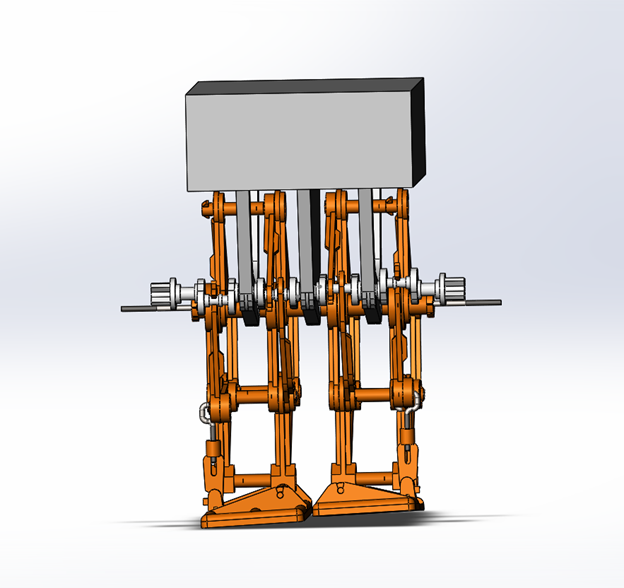
Figure 5: The legs are connected together with the shafts.
The legs are connected together with the shafts to three frame pieces that hold the legs and the body together. It also holds a box on top to fit electronics and other miscellaneous parts.
We initially planned to just stick the motor directly onto the rotating shaft on each end so that the motor rotated the shaft directly. However, Hill recommended that to balance the center of mass well, the weight of the legs should be closer together. If we went with having the motor on each side of the shafts, the weight would be shifted farther apart and make it more difficult to balance the robot. We decided to move the motor right in front of the legs so that the weight of the motor would be directly on the same plane as each leg. Since the weight would be closer to each other, the kit would have an easier time to walk while balancing itself. We created a case for our motors and modified our existing frame pieces to hold these motor cases. Since we are not putting the motors directly to the shaft, we created a two gear system. The motor spins one gear and the one gear will spin the other gear that is directly attached to the shaft so that the motor will rotate the shaft. We went with a gear system that moved from small gear to big gear and that will create more torque for the robot to move.
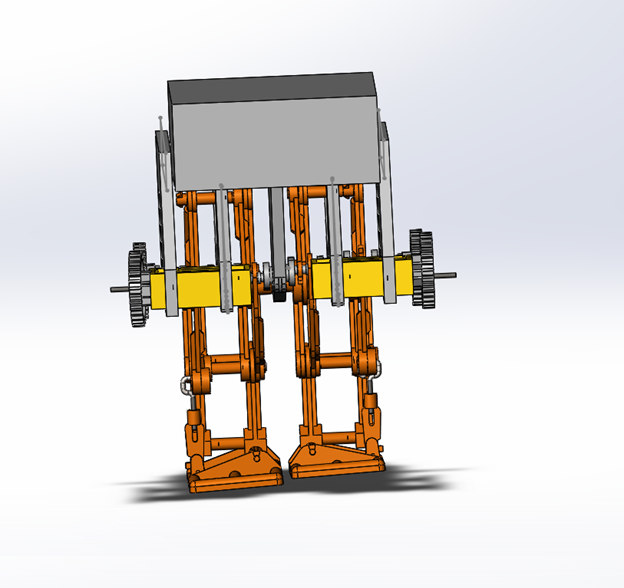
Figure 6: AT-ST with the motor case.
This is the robot after attaching gears and motor cases to the robot. We added two more frame pieces on the side to hold the motor cases and to hold the top box in place. This will add more stability to the robot and allow us to keep the motors closer to the center of the robot.
After finishing the leg and chassis design, we redesigned the box to hold the ultrasonic sensors, servo, and other electronic parts. First, we made the box longer to hold the 3DoT board and have space for the ultrasonic sensor and cables.
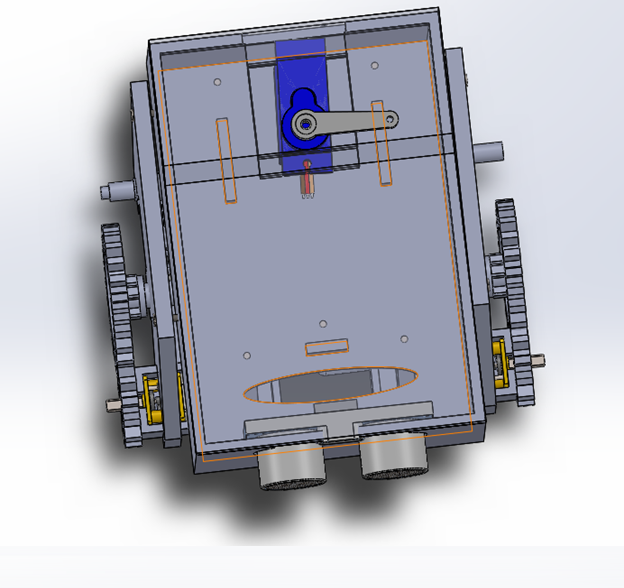
Figure 7: A transparent image of the redesigned box.
A transparent image of the redesigned box. I cut out holes in the front of the box to fit the ultrasonic sensor. A hole in the front bottom side of the box was also cut out for wires to come into the box from the two motors in front. I created small panels sticking out from the bottom side of the box so the 3DoT board will fit perfectly between the panels. Finally, I created a roof with a servo mounted to it so that the servo will act as the weight shifting mechanism.
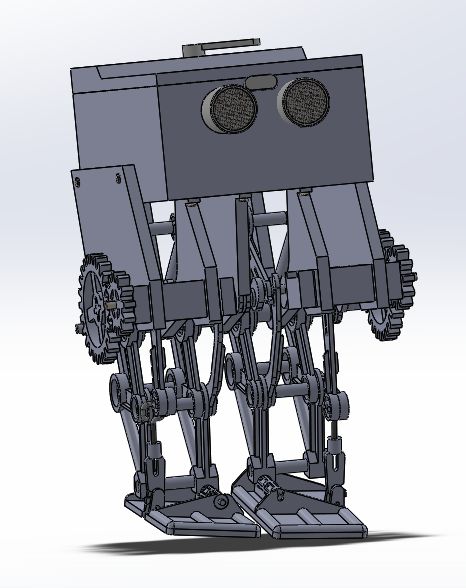
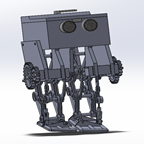
Figure 8, Final 3D Model.
Final 3D model of the robot. It contains the servo, ultrasonic sensor and the other electronic components in the box. There is a two gear system on each side of the robot.
Conclusion
There are a few things I would fix for this model. Because there are gaps between components in the model, it would be nice to hide some of the wires with panels that covered these gaps. I would also fix some of the screw holes for the model. In Solidworks, it is easy to reach these holes to put screws in, but for the actual model, it can be impossible to reach. Finally, I would adjust some holes in the box. When you 3D print the part, the 3D printing can deform the part so that your dimensions for size and holes are off. We had to sand down the parts to fix that. The issue for this type of design is that these components were not meant to be 3D printed. The design worked as intended but could be improved on. A solution to this is to redesign each component so that it is held together by screws instead of the connections and edges already on the kit components. Redesigning the components to basic connector shapes and using more screws to hold each part together will allow for easier 3D printing but maintaining the function of this design.