Thumper Bumper/Spring/2021
Spring-Utilizing Hopping Mechanism
Author: Sydney Fernandez
Table of Contents
Introduction
This is the overall design of Thumper Bumper’s legs. The purpose of this design is to have 3DoT robot hop along a 2D path in real life. For reference, the entire design and inspiration for Thumper Bumper came from a Google Doodle game featuring a bunny. We attempted to recreate the model we saw in the game but still using the 3DoT board, so we had the idea to 3D print hopping mechanism legs to attach to the 3DoT chassis. Using 3D printed models in Fusion 360, fishing line, 360 continuous micro servos, and extensions springs, we were able to have Thumper Bumper hop along the path we created for him, similar to the Google Doodle game.
Main Design Process
The following sections describe the thought process behind the spring-utilizing hopping mechanism for Thumper Bumper.
Hardware Preparation
Inspiration
To get started, we needed to reflect back on the Google Doodle game. We wanted to recreate the design of the bunny in the game as much as we can, which included a similar leg, face, and body design.
Hardware Gathering
Bouncing off the inspiration for the bunny, we get more in-depth by looking up videos on Youtube that can serve us well for the project. Ultimately we decided to use this flea-inspired jumping robot video as our core design for Thumper Bumper. In the following video, a hopping mechanism was produced after many iterations with the final product being a scissor-like design made of acrylic that is utilizing extension springs, continuous servo motors, and string. Luckily for us, springs, servo motors, and string are not hard to find or hard to purchase so we were able to test those aspects easily. We do not have an acrylic sheet cutter, but we do have access to a 3D printer so that takes us to the next topic of our design process.
Fusion 360
To make the hopping mechanism, we used a 3D printer to print out the individual parts to piece together to make the overall leg design. The modeling software we used was Fusion 360, which is accessible for students.
1st Iteration
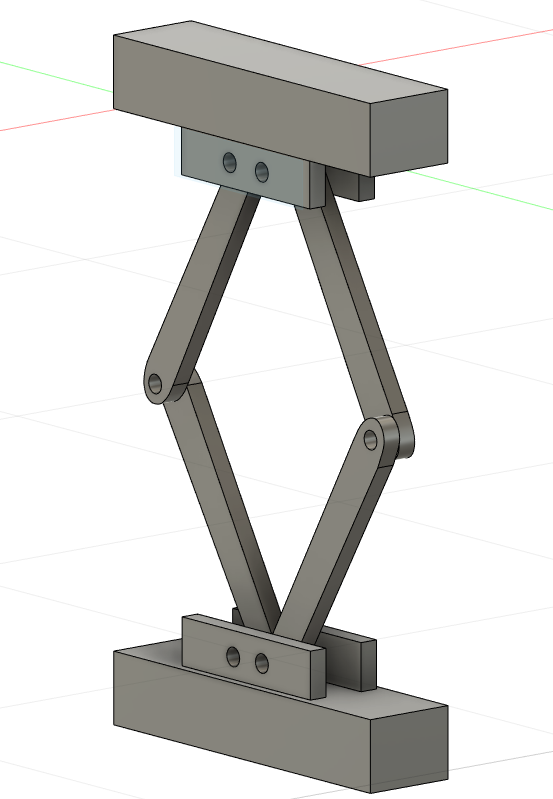
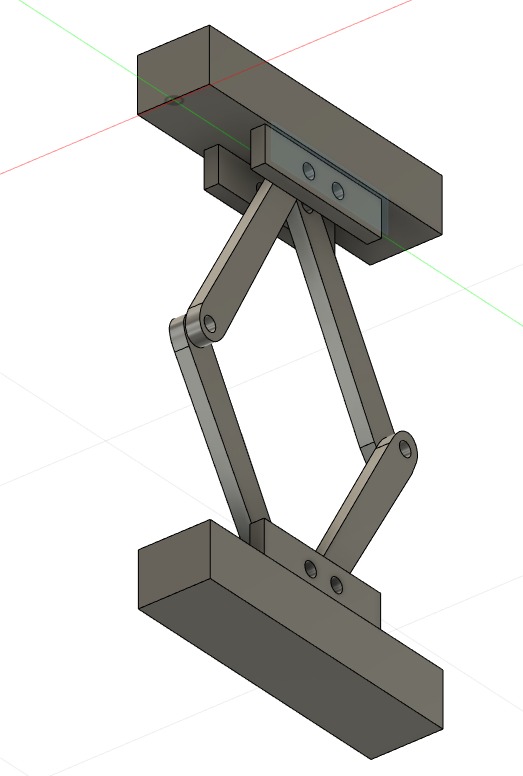
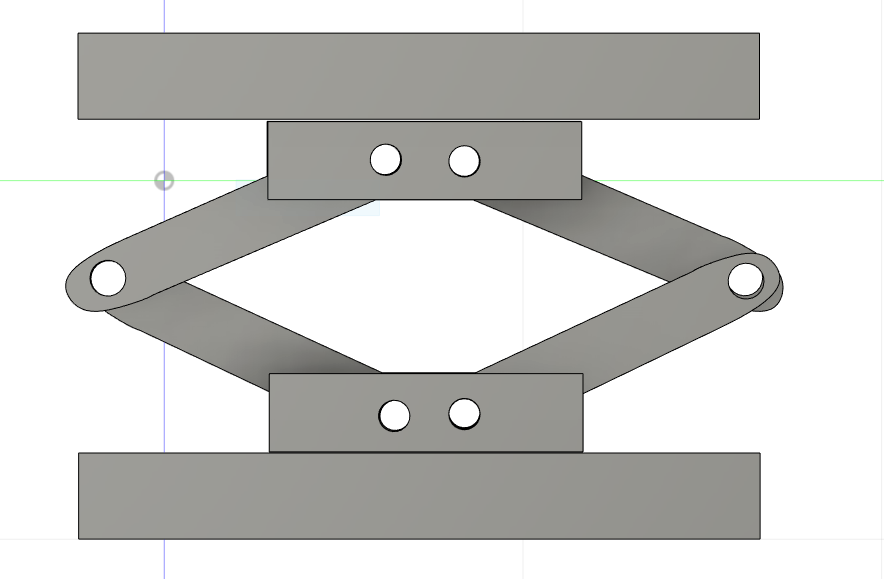
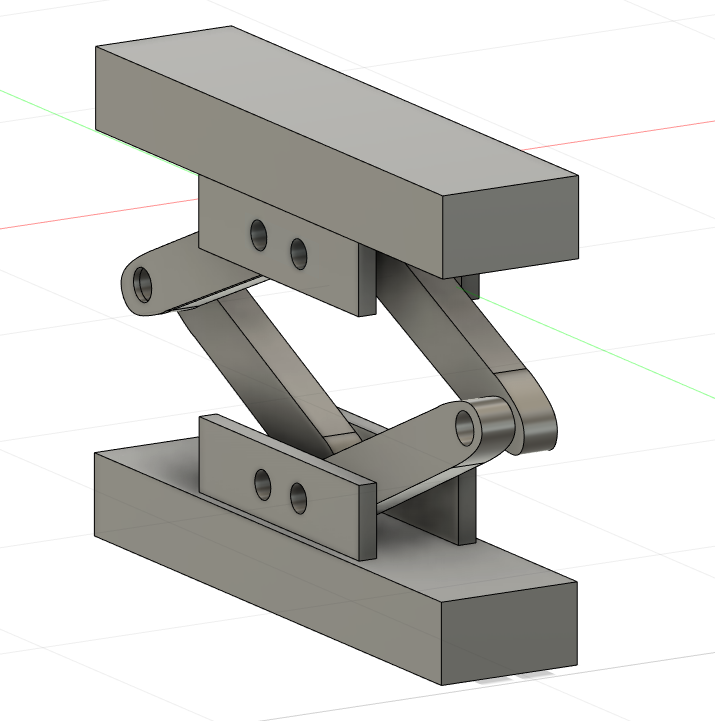
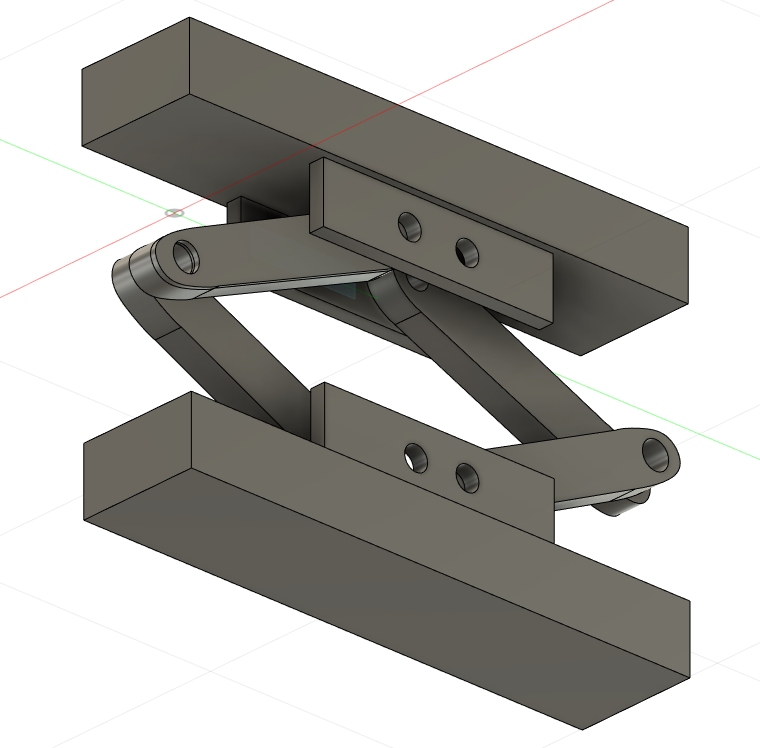
The following screenshots are of our very first design. We incorporated a scissor-like design like in the flea-bot video but in the video, we noticed that the design they used for the jumping was bulkier than we needed it to be. The jumping mechanism in the flea-bot video had two scissor-like contraptions for just one design and we though that having only one scissor-like design was enough. The 3DoT chassis itself is small, so we wanted to create legs that weren’t too big or too small. We wanted that jumping mechanism as seen in the flea-bot video to symbolize one leg on Thumper Bumper, so we wanted to minimize as much space as we can to fit onto the 3DoT chassis.
This design was made before we got the final measurements of the 3DoT chassis. When we got the 3DoT chassis, we noticed that the joint-parts were too long. The extension from the top part of the legs to the bottom parts exceeded the height of the 3DoT chassis, so you will see in the second iteration that we adjusted the length of the joints
2nd Iteration
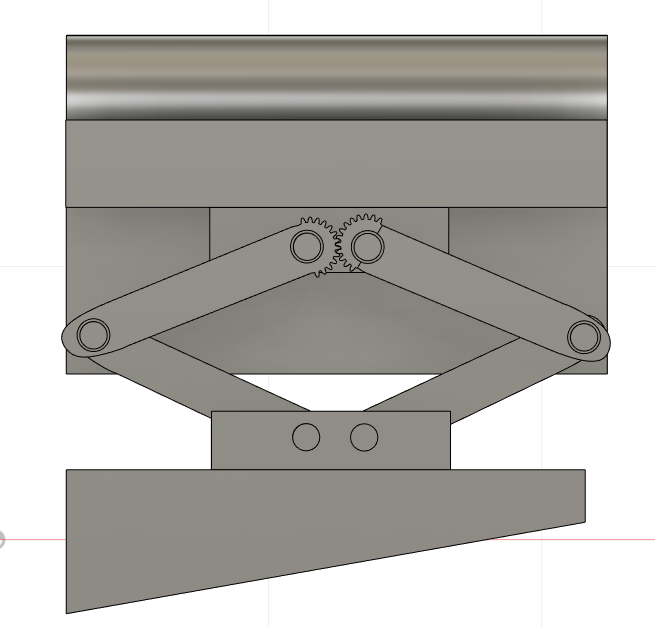
The second iteration is not that much different from the first iteration other than the fact that the joints had a length adjustment. We took this design and applied it to the 3DoT chassis. We figured out the length of the joints is what we wanted, but we found out a problem with actually attaching this to the 3DoT chassis itself. We needed to figure out a way to attach the legs to the chassis without permanently altering the chassis in some way. We also didn’t take into account a form of stabilization, some way for the robot to self-balance, so you’ll see in the third and last iteration of the leg design process how we managed to come up with our final product by taking these issues into consideration.
3rd Iteration
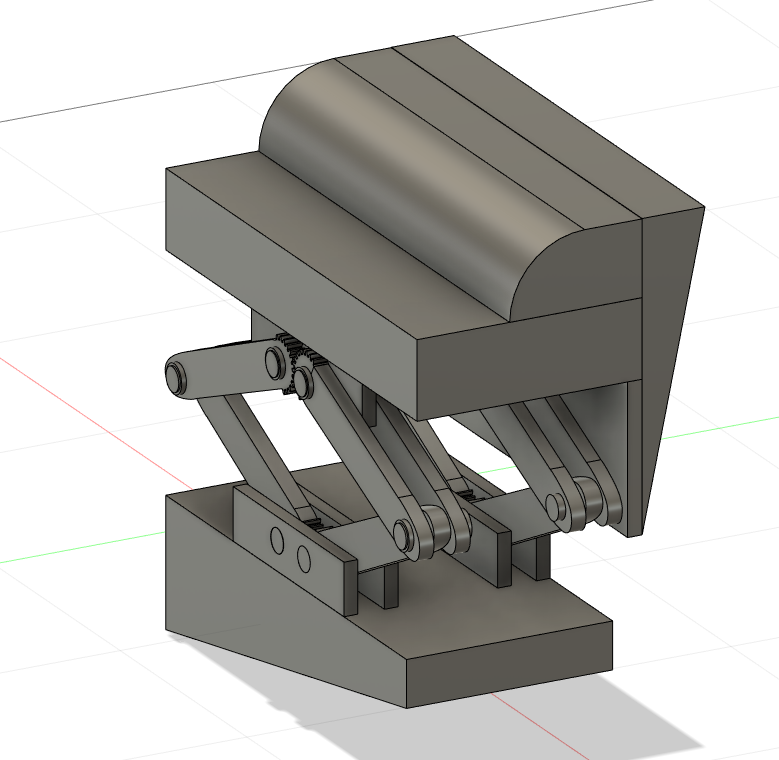
This is the final design of the hopping mechanism that we produced for the demonstration. Let’s go over problems we had between the second iteration and the last iteration: we needed to figure out how to attach the leg designs to the 3DoT chassis without permanently changing the chassis, to figure out how to self-stabilize the robot after hopping, and how to pull down the top part of the legs to initiate the hop itself.
To fix the attachment issue, we included a panel that could fit into the chassis. The panel takes the shape of the side 3DoT chassis where the wheels would go. The panels take into account the wheels of the 3DoT chassis, so we made sure the panel wouldn’t hinder the wheels.
To fix the self-stabilizing issue, we made altered the joints and made the base of the feet wider. The joints now have a cog-like shape at the tops and bottoms of the legs. Without the cog-like shape, the joints were not holding against each other, which made the whole leg design collapse on itself. They were not holding each other up like in the flea-bot video, so when I took a closer look at the design from the video, I noticed the cog-like shape on the joints. After redesigning the joints, the leg design started holding up. The base of the feet was also made larger to cover more surface, make sure the robot would balance itself more, and it also takes into consideration space for the servo motors.
Lastly, to have a way to pull down the top part to initiate the hop, I inserted a little hole to the top of the leg for the fishing line to snake through. The fishing line would attach to the continuous micro servo. From there, the servo would turn on, winding the string down, which then pulls down the top part and thus preparing the legs for a hop.
Conclusion
Overall, this design was a process and took several iterations to get to our final product. Each iteration was a trial-and-error action that had a good concept in theory but ultimately would need more time and careful consideration to execute accurately. If we had hard calculations that took physics into thought as well as properly executed code that associates with the servo motors, the leg design would have gone smoother.
References/Resources
- https://www.google.com/logos/2017/logo17/logo17.html?hl=en
- https://www.youtube.com/watch?v=tj5UfTWCB2c&ab_channel=JumpingRobot


