By:
Luis Valdivia (Project Manager)
Anthony Becerril (Mission, systems and test)
Juan Mendez (Design and manufacturing)
Kevin Nguyen (Electronics and Controls)
Table of Contents:
- Project Manager Research
- Mission, Systems and Test
- Design and Manufacturing
- Electronics and Controls
- Creativity Assignment
1. Project Manager Research:
Project Level 1 requirements:
Overview/Purpose: Highlight baseline qualitative requirements for the overall mission.
Mission Objective(s) from previous semesters: Produce aircraft that performs flight path set by the customer. The aircraft must also maintain stability as it travels its flight path. To meet aesthetic requirements set by the customer, the vehicle must resemble a UFO or the Millennium Falcon as well as producing a light show
Mission requirements from previous semesters:
- Complete the project before end of semester
- Follow regulations and policies for the Federal Aviation Administration (FAA), Unmanned Aircraft Systems (UAS) and College of Engineering (COE) health and safety.
- Not exceed the budget
- Aircraft will maintain stable altitude
- Remote control aircraft and display light show
- Meet aesthetic requirement set by the customer (look like a UFO or the millennium falcon).
Mishaps:
- Not able to maintain stability due to uncontrolled yaw rotation thus failing flight path requirement.
Proposed solution for Spring 2016:
- Correct yaw stability issue by performing case studies (if allowed by customer) of fans mounted at certain angles.
- Design adjustable angle brackets.
- researching counter rotating fans to correct yaw issue (if allowed by customer)
- Review policies and regulations set by the aforementioned organizations.
- Establish safety landing feature that will slowly land view at low battery voltage.
- Design and Manufacture interchangeable landing leg system.
Project Budget:
Overview/Purpose: Keep track of budget to avoid overspending.
Budget based on previous semesters:
- Work with cost estimate as an outline to follow this semester.
- Preliminary budget based on previous projects around $400
Mishap: None. Requirements were met by remaining under set budget.
Proposed solution(s) for Spring 2016:
- Create spreadsheet that keeps track of budget for all vendors and components of the vehicle.
- Weekly update main spreadsheet with all procurement details.
- Emphasize consistent documentation format to make information easy to access during the semester.
Project Schedule:
Overview/Purpose: Set a work schedule to follow on a weekly basis throughout the semester..
Project schedule based on previous semesters.
- Use level 1/2 requirements to establish appropriate schedule .
- Keep track of time invested each week for all members.
- Include status and completion for each member.
Proposed solution(s) for Spring 2016:
- Document progress every time an action item is closed.
EVALUATION RUBRIC
- Is the requirement, Quantitative, Verifiable, and Realizable?
- Is the requirement located at the correct level (1 – program / Project)
- Is the requirement response to a higher level requirement or customer’s objective (Requirement Flow Down)? Is the linkage clearly defined?
- Does requirement provide links to source material?
- Does the requirement move the design process forward?
- Are equations used to calculate a requirement provided and are answers correct?
- The requirements that are missing are the hardest to discover and will be factored into your evaluation.
- Is language in the form of a requirement?
- Avoid multiple requirements within a paragraph (i.e., breakup statements that contain multiple requirements.)
Y= Yes
N= No
X= No answer needed
| Level 1 Requirements based from previous semesters |
1 |
2 |
3 |
4 |
5 |
6 |
7 |
8 |
9 |
| Must complete the project before end of semester. |
Y |
Y |
N |
Y |
N |
N |
X |
Y |
X |
| Will follow regulations and policies for the FAA, UAS, & COE. |
Y |
Y |
Y |
Y |
N |
N |
X |
Y |
X |
| Must not exceed budget. (estimated $400 from last semester) |
Y |
Y |
N |
N |
N |
Y |
X |
Y |
X |
| Aircraft will maintain stable altitude while completing course. |
Y |
Y |
Y |
Y |
Y |
N |
X |
Y |
X |
| Remote control aircraft and display light show. |
Y |
Y |
Y |
N |
N |
N |
X |
N |
X |
| Meet aesthetic requirement set by the customer. |
Y |
Y |
N |
N |
Y |
N |
X |
Y |
X |
Works cited:
- Arechiga, Danny. “Level 1 Requirements.” Arxterra. N.p., 16 Sept. 2015. Web. 11 Feb. 2016. <https://www.arxterra.com/level-1-requirements-4/>.
- Hatori, Ayaka. “Arxterra | Mission Objective and Level 1 Requirements.” Arxterra. N.p., 18 Mar. 2015. Web. 11 Feb. 2016. <https://www.arxterra.com/mission-objective-and-level-1-requirements/>.
- Hatori, Ayaka. “Final Documentation.” Arxterra. N.p., 13 May 2015. Web. 11 Feb. 2016. <https://www.arxterra.com/final-documentation-3/>
- Hatori, Ayaka. “Arxterra | Final Documentation.” Arxterra. N.p., 13 May 2015. Web. 11 Feb. 2016. <https://www.arxterra.com/executive-summary-final-project-documentation/>
- Hatori, Ayaka. “Mission Objective and Level 1 Requirements.” Arxterra. N.p., 8 Mar. 2015. Web. 11 Feb. 2016. <https://www.arxterra.com/ufo-intro/>.
- Mohideen, Shamir. “UFO Final Documentation.” Arxterra. N.p., 14 Dec. 2014. Web. 11 Feb. 2016. <https://www.arxterra.com/ufo-final-documentation/>.
- Mohideen, Shamir. “UFO Preliminary Project Documentation.” Arxterra. N.p., 28 Oct. 2014. Web. 11 Feb. 2016. <https://www.arxterra.com/ufopreliminary-project-documentation/>.
- Vo, Tuan, and Elaine Doan. “Level 1 Requirements.” Arxterra. N.p., 21 Apr. 2014. Web. 11 Feb. 2016. <https://www.arxterra.com/level-1-requirements/>.
- Teng, James. “UFO Preliminary Project Plan.” Arxterra. N.p., 30 Sept. 2015. Web. 11 Feb. 2016. <https://www.arxterra.com/ufo-preliminary-project-plan/>.
- Hatori, Ayaka. “Arxterra | Final Documentation.” Arxterra. N.p., 13 May 2015. Web. 11 Feb. 2016. <https://www.arxterra.com/executive-summary-final-project-documentation/>.
- Stapleton, Anne. “Final Project Progress Report.” Arxterra. N.p., 19 Dec. 2013. Web. 11 Feb. 2016. <https://www.arxterra.com/project-progress-report/>.
- Mohideen, Shamir. “Schedule.” Arxterra. N.p., 14 Dec. 2014. Web. 11 Feb. 2016. <https://www.arxterra.com/schedule/>.
- Teng, James. “UFO Project Summary.” Arxterra. N.p., 17 Dec. 2015. Web. 11 Feb. 2016. <https://www.arxterra.com/ufo-project-summary/>.
2. Mission, Systems and Testing Research:
LEVEL 2 REQUIREMENTS:
Overview/Purpose: Detail level 2 requirements in alignments with level 1 requirements made to complete mission
Level 2 Requirements from previous semesters:
- Quadcopter frame and electric ducted fans
- specify UFO diameter and weight
- Fire protection
- LED ring for light show
- Use of Electronic Speed Controllers (ESCs)
- Control system consisting of microcontroller and flight controller
- wireless communication via phone application and bluetooth module
- Landing gear equipment
- Shell mold for UFO appearance
- Achieve flight and specify elevation and flight speed
- Provide sufficient power for classroom flight
Mishaps: Stable flight has yet to be achieved with certain requirements never initiated (landing gear, flight, fire protection,…)
Proposed Spring 2016 Solution: revise level 2 requirements and consider new ones if new level 1 requirements are made
DIGITAL SIGNAL CANCELLATION:
Overview/Purpose: Implementation of signal cancellation from a digital approach, specifically by inverting the signal
Digital Signal Cancellation from previous semesters:
- Via Simulink, simple cancellation made via inverting signal (sine wave used)
- Via audio recording, cancellation attempted by simultaneously playing sounds of original signal and inverted signal (guidance with matlab code)
Mishaps: Cancellation failed via audio recordings
Proposed Spring 2016 Solution: Discuss with team if further work is necessary; If approved look into researching noise cancellation for aircrafts
NEOPIXEL LED LIGHT SHOW:
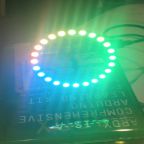
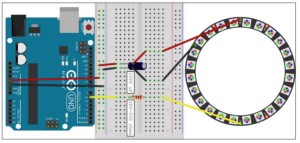
Overview/Purpose: A lightshow on the Adafruit NeoPixel Ring controlled with a microcontroller, bluetooth module, and app
NeoPixel LED Light Show from previous semesters:
- LED control circuit w/o bluetooth to test custom light shows
- LED control w/ bluetooth module via bluetooth terminal app
- Light show integration with arxterra code
- Created function/code from scratch for programming lightshow
Mishaps: None; successful creation of programmable LED light show; tape lights considered and never revisited
Proposed Spring 2016 Solution: Consider investigation light functions to display battery life
BLUETOOTH INTERFACE TO ARXTERRA APPLICATION:
Overview/Purpose: how to use bluetooth to control the UFO via phone
Bluetooth Interface from previous semesters:
- step-by-step procedure on testing a bluetooth module with simple LED example
- via phone application and Multiwii controller, the UFO can be controlled wirelessly
Mishaps: None; successful bluetooth integration
Proposed Spring 2016 Solution: Consider using, editing, or remaking method of controlling the UFO
ESC CURRENT DRAW TEST:
Overview/Purpose: Calculations of current draw from EDFs for overall power consideration
ESC Current Draw Test from previous semesters:
- Completed testing and tabled results
Mishaps: Upon shorting, an upgrade was made to replace the ESC for short time to maximum throttle
Proposed Spring 2016 Solution: Consider retesting to check for functionality
EDFs (ELECTRIC DUCTED FANS):
Overview/Purpose: Overview on Electric Ducted Fans (EDFs) bought and installed on the UFO.
EDFs work from previous semesters:
- Specifications provided: Dr. Mad 50mm 10 blade EDFs
- Calculation of thrust outputs at various throttle levels for each EDF
- Completed testing and tabled results
- not perfectly linear
- estimated weight: 1100g; 1100g thrust = 60%-70%; conclusion: stable flight = > 70% throttle
- Cancelling horizontal torque of EDFs
- New Fans: too costly and couldn’t find one to fit UFO model
- Fan Tilt: tilt for counter clockwise thrust; concluded tilt will prevent spinning
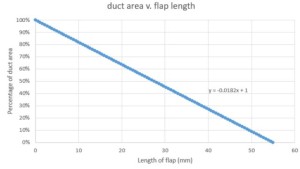
- Air Ducts: implement louvers to redirect airflow
- Testing done on best number of blades
- Solidworks simulation done to see if air ducts will minimize rotation in same direction
Mishaps:
- Calculations of blade positioning seem incorrect
- Cancelling of horizontal torque failed
- Testing number of blades only considered three and ten blades
- Air duct testing did not resolve unwanted rotation
Proposed Spring 2016 Solution: Retake tests and specifications
WIRELESS REMOTE COMMUNICATION USING XBEE RADIOS:
Overview/Purpose: wireless communication between the UFO and the user via an XBee Radio
Wireless Remote Communications from previous semesters:
- controller: joysticks controlling vertical and horizontal via potentiometers
- XBee: configuration, data, interpretation
- vertical testing: joystick up increased fans accordingly
Proposed Spring 2016 Solution:
- Consider getting new EDFs
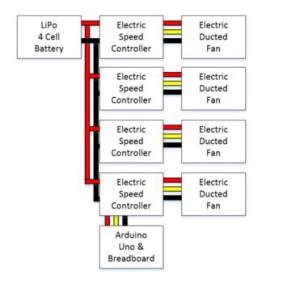
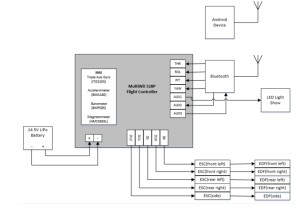
UFO SYSTEM BLOCK DIAGRAM AND ELECTRICAL SCHEMATIC:
Overview/Purpose: Provided system block diagram and electrical interface diagram of UFO
System Block Diagram and Electrical Schematics from previous semesters:
- outlines system block diagram
- corresponding wiring diagram for system block diagram outlined
Mishaps: upon visual inspection, there is room for improvement
Proposed Spring 2016 Solution: Update with any changes made this semester
EVALUATION RUBRIC
- Is the requirement, Quantitative, Verifiable, and Realizable?
- Is the requirement located at the correct level (1 – program / Project)
- Is the requirement response to a higher level requirement or customer’s objective (Requirement Flow Down)? Is the linkage clearly defined?
- Does requirement provide links to source material?
- Does the requirement move the design process forward?
- Are equations used to calculate a requirement provided and are answers correct?
- The requirements that are missing are the hardest to discover and will be factored into your evaluation.
- Is language in the form of a requirement?
- Avoid multiple requirements within a paragraph (i.e., breakup statements that contain multiple requirements.)
Y= Yes
N= No
X= No answer needed
| Level 2 Requirements based from previous semesters |
1 |
2 |
3 |
4 |
5 |
6 |
7 |
8 |
9 |
| UFO will be created with quadcopter frame and electric ducted fans |
Y |
Y |
Y |
N |
Y |
N |
X |
Y |
X |
| UFO will have specific diameter and weight |
Y |
Y |
N |
N |
N |
N |
X |
Y |
X |
| UFO will be protected against fires |
N |
Y |
Y |
Y |
Y |
N |
X |
Y |
X |
| UFO will utilize LED ring for light show |
Y |
Y |
Y |
N |
Y |
Y |
X |
Y |
X |
| UFO will use Electronic Speed Controllers (ESC) |
Y |
Y |
Y |
N |
Y |
N |
X |
Y |
X |
| UFO will use a microcontroller and flight controller as control system |
Y |
Y |
Y |
N |
Y |
N |
X |
Y |
X |
| UFO will be able to communicate wirelessly via Arxterra application and bluetooth module with specific range |
Y |
Y |
Y |
N |
Y |
N |
X |
Y |
X |
| UFO will be equipped with landing gear |
Y |
Y |
Y |
N |
Y |
N |
X |
Y |
X |
| UFO will have shell to give likeliness to UFO |
Y |
Y |
Y |
N |
Y |
N |
X |
Y |
X |
| UFO to achieve flight with specific elevation and speed |
Y |
Y |
Y |
Y |
Y |
N |
X |
N |
X |
| UFO to provide enough power for flight around classroom |
Y |
Y |
Y |
Y |
Y |
N |
X |
N |
X |
Works cited:
- Hatori, Aya. “UFO Level 2 Requirements.” Arxterra. N.p., 4 Apr. 2015. Web. 11 Feb. 2016. <https://www.arxterra.com/ufo-level-2-requirements/>.
- Vo, Tuan, and Elaine Doan. “Level 2 Requirements.” Arxterra. N.p., 21 Apr. 2014. Web. 11 Feb. 2016. <https://www.arxterra.com/level-2-requirements-2/>.
- Nunez, Marco. “Digital Signal Cancellation.” Arxterra. N.p., 23 Nov. 2015. Web. 10 Feb. 2016. <https://www.arxterra.com/digital-signal-cancellation/>.
- Nunez, Marco. “Custom Programmable LED Light Shows.” Arxterra. N.p., 14 Nov. 2015. Web. 11 Feb. 2016. <https://www.arxterra.com/custom-programmable-led-light-shows/>.
- Nunez, Marco. “Creating NeoPixel Ring Lightshow.” Arxterra. N.p., 8 Nov. 2015. Web. 11 Feb. 2016. <https://www.arxterra.com/creating-neopixel-ring-lightshow/>.
- Webster, Logan. “How To: Light Show!” Arxterra. N.p., 20 Apr. 2015. Web. 11 Feb. 2016. <https://www.arxterra.com/how-to-light-show/>.
- Mohideen, Shamir. “LED Tape Lights for the UFO.” Arxterra. N.p., 13 Dec. 2014. Web. 11 Feb. 2016. <https://www.arxterra.com/led-tape-lights-for-the-ufo/>.
- Nunez, Marco. “Learning To Use a Bluetooth Module.” Arxterra. N.p., 20 Oct. 2015. Web. 11 Feb. 2016. <https://www.arxterra.com/learning-to-use-a-bluetooth-module/>.
- Alhammadi, Ahmed. “Bluetooth Interface to Arxterra Application.” Arxterra. N.p., 8 Apr. 2015. Web. 11 Feb. 2016. <https://www.arxterra.com/bluetooth-interface-to-arxterra-application-in-progress/>.
- Winter, Nathan. “ESC Current Draw Test.” Arxterra. N.p., 13 Dec. 2014. Web. 11 Feb. 2016. <https://www.arxterra.com/esc-current-draw-test/>.
- Winter, Nathan. “Electric Ducted Fans.” Arxterra. N.p., 13 Dec. 2014. Web. 11 Feb. 2016. <https://www.arxterra.com/electric-ducted-fans/>.
- Winter, Nathan. “Dr. Mad 50 Mm 10 Blade EDFs.” Arxterra. N.p., 13 Dec. 2014. Web. 11 Feb. 2016. <https://www.arxterra.com/dr-mad-50-mm-10-blade-edfs/>.
- Winter, Nathan. “EDF Thrust Test.” Arxterra. N.p., 13 Dec. 2014. Web. 11 Feb. 2016. <https://www.arxterra.com/edf-thrust-test/>.
- Winter, Nathan. “Cancelling the Horizontal Torque Produced by EDFs.” Arxterra. N.p., 25 Nov. 2014. Web. 11 Feb. 2016. <https://www.arxterra.com/cancelling-the-horizontal-torque-produced-by-edfs/>.
- Hatori, Ayaka. “Electric Ducted Fans – Number of Blades TOS.” Arxterra. N.p., 6 Mar. 2015. Web. 11 Feb. 2016. <https://www.arxterra.com/electric-ducted-fans-number-of-blades-tos/>.
- Montano, Juan. “Implementing the Air Ducts.” Arxterra. N.p., 20 May 2014. Web. 11 Feb. 2016. <https://www.arxterra.com/implementing-the-air-ducts/>.
- Rice, Jake. “Wireless Remote Communication Using XBee Radios.” Arxterra. N.p., 20 Mar. 2014. Web. 11 Feb. 2016. <https://www.arxterra.com/wireless-remote-communication-using-xbee-radios/>.
- Stapleton, Anne. “System Block Diagram & Electrical Schematic.” Arxterra. N.p., 2 Dec. 2013. Web. 11 Feb. 2016. <https://www.arxterra.com/system-block-diagram-electrical-schematic/>.
- Ceballos, Salvador. “UFO System Block Diagram and Interface.” Arxterra. N.p., 8 Apr. 2015. Web. 11 Feb. 2016. <https://www.arxterra.com/ufo-system-block-diagram-and-interface/>.
3. Design and Manufacturing Research:
YAW Problem:
Overview/Purpose: The reaction wheels were to be fabricated in order for fix the Yaw problem
Research on previous semester work:
- Group decided to make reaction wheels to solve the yaw problem.
- Group decided that a cylinder design would work and that they should spin opposite of fans.
- Determined that heavier material would produce more torque.
- Group agreed to to use ABS plastic since it was the easiest to fabricate using a 3D printer
- Fritzing diagram was developed
- After receiving recommendations from the class president, the reaction wheels idea was scrapped and the group agreed to tilt the angle of thrust of the fans in order to mimic a quadcopter and fix the yaw problem.
- Group decided to test if more blades on fan gave more thrust. They tested 3 blade fans vs 10 blade fans. They came to the conclusion that the 10 blade fan produced more thrust but ended up using a 5 blade fan because they did not have enough of the 10 blade fan to use.
- From the previous semester it seems that the motor mounts required taping of the motors and to avoid this they had planned to use an acrylic block.
- Solidworks was used to determine the airflow of the fans
- Based on these simulations, it was determined that the air flows like an upside down whirlwind which would turn into a problem if they have another fan spinning the same direction. The airflow of two fans made the airflow go upward instead of straight down.
- To fix this, the group decided to use an air duct to stabilize it. It seems like they still had a problem with the yaw and to fix this, they repositioned the air duct.
Mishaps
Proposed Solution for Spring 2016:
- In order to speed up the process, we will be looking into changing the fans and will be performing different tests to see which fans work better. We may possibly get more fans or change the rotation of the fans.
UFO’s shell production:
Overview/Purpose: The purpose of the shell was to give the UFO a look that resembled the craft from the movie “ The day the Earth stood still”
Research on previous semester work:
- Manufacturing Engineer worked with a Design Engineer to make the UFO Shell molding
- 14 24x4x1 pieces of foam were glued together to make a piece big enough to make the mold.
- Holes were then cut, though the group did not state how they determined the size and position of the holes and then painted the shell glossy gray.
- Group talked about mounting on a frame or shell and they agreed that frame mounting was better since it was cleaner and lighter and easier to work with.
- They then researched the materials to construct the shell ( styrene or carbon fiber shell). They agreed to use Styrene since it was lighter and cheaper
- A negative of the shell was created to be used on the UFO
- Next they decided to vacuum form mold a shell. They had a shell from the previous semester and they were able to use it for the vacuum form molding. It proved to be a much better but they still had some issues such as having a hole in the shell.
- Their manufacturing Engineer made urethane foam mold on the lathe machine in the design lab. She did this by one inch by 1.5 inch of layers together with spray adhesives and waiting for them to bond. Next the holes for each motor were determined and done by using a 55mm drill press.
- Next they used the plastic molding machine. Eight forms were made with each attempt adjustments were made to the mold. The shell was then painted silver.
Mishaps
- They soon discovered that the lathe machine used to make the dome shape was 6 inches and would only provide 12 inches diameter. The shell diameter needed to be 15 inches. To fix this, they cut the foam in half in order to make them separately then glue them back together. Two shells were made, one that was ⅛ of an inch and the other 1/16 an inch. After vacuuming the shell, the ⅛ ended up being too thick for the UFO so the group decided to stick to the 1/16 shell. (Fall 2015)
- At first attempts the mold was left in high temperatures and became disfigured.(Spring 2015)
- Apparently they attempted to removed the material from the lathe but it failed since they removed too much material. They had to remake the mold. (Spring 2015)
- The group attempted to print out the ufo and then piece it together. Due of time constraints they were not able to get the mold right. They only got the prototype one and was considered to be 20 percent done.
Proposed Solution for Spring 2016:
- We will model out our mold to look like the millenium falcon. Using the same techniques that previous semesters did, we will be making a mold for it but instead of making separate pieces to make it look like the ufo from “ The day the earth stood still”, we will be making different pieces to make it look like the Millenium falcon. We may end up making the bigger round piece the same way last semester did it, with the adjustments of the fans then bond on the additional pieces to make it look like the Millennium falcon. We will take precautions in order to not make the same mistakes from last semester such as speeding up the process using the lathe machine by taking the right dimensions and also not burning out the mold.
UFO’s PCB:
Overview/Purpose: To create a PCB and a surface mount device used to control the UFO and LED light show.
Research on previous semester work:
- Group got rid of bundle of wires used to distribute the power to the ECS and LED’s
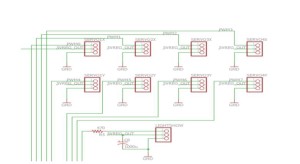
- Labeling was added to the EagleCAD schematic so that everyone knew which part was which.
- Copper pad was added around the board
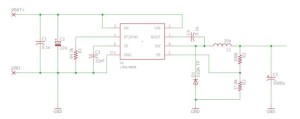
- Group decided to build a separate custom PCB for the battery protection of the circuit since the lithium polymer did not include a built in protection circuit.
- They followed a protection circuit that was created by DIY Perks. They incorporated what they learned to their PCB and they combined the components required to protect the light show as well to the PCB.
- Once silicon was applied to the carbon fiber mold, it took about 18 hours for it to cure.
Mishaps
- When assembling the PCB the potentiometer was connected incorrectly but was quickly fixed. (Spring 2015)
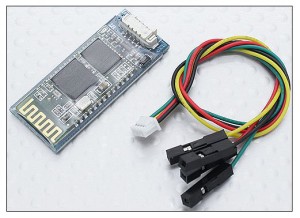
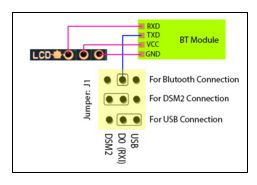
- The group wanted to have the Multiwii on top of the PCB with space in between but they did not have enough clearance to connect the Bluetooth module on top of the PCB. To fix this they used 90 degree male headers and then connected to the bluetooth module from the outside. (Spring 2015)
- The group was missing a crystal oscillator. To fix this, they took another one and soldered it to the PCB. Test code worked but the custom code did not work, perhaps because the bluetooth module was syncing to the board properly. (Spring 2015)
- Lastly they did not give the PCB enough space to distribute all current required to power the UFO. Connectors also broke while assembling it but they used wires to fix it.(Spring 2015)
Proposed Solution for Spring 2016: This semester, we will be ensuring that the PCB has enough space to make sure that current flows through smoothly. We will also be working on Soldering on the components properly. One thing that was notices was that some wires were not soldered on properly, therefore breaking off and possibly not making a proper connection. We will also be insulating out wire components in order to not have a bundle of wires nested around.
Carbon Fiber Body:
Overview/Purpose: To build a carbon fiber body for the UFO using the design from the previous semester.
Research on previous semester work:
- A silicon mold was made from the original 3D printed body and then the carbon fiber pieces were made from the mold.
- A quarter of a mold was made since it is very expensive to make. apparently it is 25$ for two bottles.
- 3D printed parts needed to be sanded down since undesired grooves were made while being printed.
Mishaps
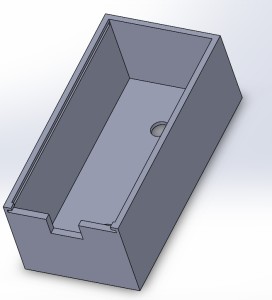
Proposed Solution for Spring 2016: Not much modifications will be done to the carbon fiber body. The only improvement we are proposing is to add on a case for the battery since it is unprotected at the moment and want to protect it from getting damaged. Along with making a case we want to add on landing legs to it so the UFO will land safely instead of landing on the battery itself.
- Teng, James. “UFO Project Summary.” Arxterra. N.p., n.d. Web. 11 Feb. 2016. <https://www.arxterra.com/ufo-project-summary/>.
- Teng, James. “Reaction Wheel Research.” Arxterra. N.p., 26 Oct. 2015. Web. 11 Feb. 2016. <https://www.arxterra.com/reaction-wheel-research/>.
- Teng, James. “Reaction Wheel Material Trade-off Studies.” Arxterra. N.p., 29 Oct. 2015. Web. 11 Feb. 2016. <https://www.arxterra.com/reaction-wheel-material-trade-off-studies/>.
- Hatori, Ayaka. “Final Documentation.” Arxterra. N.p., 13 May 2015. Web. 11 Feb. 2016. <https://www.arxterra.com/final-documentation-3/>.
- Hatori, Ayaka. “Electric Ducted Fans – Number of Blades TOS.” Arxterra. N.p., 6 May 2015. Web. 11 Feb. 2016. <https://www.arxterra.com/electric-ducted-fans-number-of-blades-tos/>.
- Montano, Juan. “Implementing the Air Ducts.” Arxterra. N.p., 20 May 2014. Web. 12 Feb. 2016. <https://www.arxterra.com/implementing-the-air-ducts/>.
- Montano, Juan. “Determining the Number of Fans.” Arxterra. N.p., 16 Mar. 2014. Web. 12 Feb. 2016. <https://www.arxterra.com/determining-the-number-of-fans/>.
- Huynh, Tien-Phuc. “UFO Shell’s Production.” Arxterra. N.p., 6 Dec. 2015. Web. 12 Feb. 2016. <https://www.arxterra.com/ufo-shells-production/>.
- Sakurai, Catherine. “UFO Shell Trade off Studies.” Arxterra. N.p., 15 Apr. 2015. Web. 12 Feb. 2016. <https://www.arxterra.com/ufo-shell-trade-off-studies/>.
- Hatori, Ayaka. “Shell Molding.” Arxterra. N.p., 6 May 2015. Web. 12 Feb. 2016. <https://www.arxterra.com/shell-molding/>.
- Hatori, Ayaka. “Completed Project with Progress Update.” Arxterra. N.p., 13 May 2015. Web. 12 Feb. 2016. <https://www.arxterra.com/completed-project-with-progress-update/>.
- Vo, Tuan. “Building the UFO 1.02 (Code Name: George Michael).” Arxterra. N.p., 20 May 2014. Web. 12 Feb. 2016. <https://www.arxterra.com/building-the-ufo-1-02-code-name-george-michael/>.
- Huynh, Tien-Phuc. N.p., 16 Dec. 2015. Web. 11 Feb. 2016. <https://www.arxterra.com/ufos-printed-circuit-board/>.
- Hatori, Ayaka. N.p., 13 May 2015. Web. 11 Feb. 2016. <https://www.arxterra.com/pcb-design-battery-protection-circuit/>.
- Winter, Nathan. “Manufacture the Carbon Fiber Body.” Arxterra. N.p., 25 Nov. 2014. Web. 12 Feb. 2016. <https://www.arxterra.com/manufacture-the-carbon-fiber-body/>.
4. Electronics and Controls Research:
YAW Control:
Overview/Purpose: Prevent UFO from spinning uncontrollably by stabilizing the yaw rotation.
Yaw Control from previous semester:
- 3 Possible Ideas:
- Reaction Wheel spins in opposite direction to cancel out yaw rotation.
- Attach a 5th fan on the side to counter the rotation caused by the other 4 fans
- Tilt fans.
Mishaps:
- Several experiments show that the reaction wheel would not work.
- A 5th fan on the side would disturb the symmetry of the UFO and cause additional problems.
Proposed Solution for Spring 2016:
- Tilting the EDFs is the easiest way to cancel out the yaw rotation. More experiments will be needed to determine the angles best suited for our UFO.
PID Tuning:
Overview/Purpose: Determine the best coefficient values for our PID controller so that we would achieve the most efficient stabilizing effect.
PID tuning from Previous Semester:
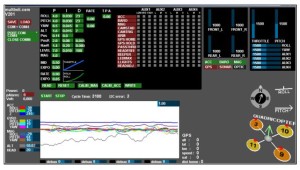
- Used “EZ-GUI Ground Station” app to find P,I,D gains.
- Strapped UFO to inverted chair for safety and easy tuning process.
Mishaps:
Proposed Solution for Spring 2016:
- Discuss with team if further work is agreed upon.
- Possibly incorporate other types of controller designs besides PID for more efficiency. ex.LQR
Analog Noise Cancellation:
Overview/Purpose: Use analog components to design a noise cancelling circuit to reduce the noise of the UFO.
Analog Noise Cancellation from Previous Semester:
- Designed a noise cancelling circuit.
- The circuit receives the input signal through a microphone.
- Input signal is sent through a non-inverting amplifier to boost the voltage to workable levels.
- The boosted signal is then sent through an inverting amplifier to shift it 180 degrees.
- After amplifying and inverting the signal, it is sent to a speaker to produce noise.
Mishaps:
- Theoretically, when this output noise is played alongside the input noise, the 2 should cancel each other out. It did not work as expected.
- The input noise and the output noise must precisely synchronize in order to cancel out each other. This proved too difficult to achieve.
Proposed Solution for Spring 2016:
- Discuss with team if further work is agreed upon.
Experiment: Battery Discharge Characteristics and Voltage Monitor:
Overview/Purpose:
- Determine how long battery will last while UFO is running at 80% throttle.
Battery Discharge Characteristics and Voltage Monitor from previous Semester:
- Test circuit was designed to read the voltage levels of each cell within the battery.
- The UFO was then connected to the circuit and turned on at 80% throttle while the voltage levels were being monitored.
- Data shows that the battery cells reached undesired levels at around 10 minutes.
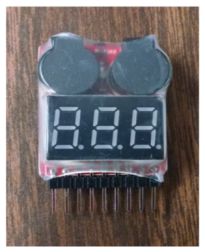
- Voltage reader was then constructed as a warning indicator of low battery levels.
Mishaps:
Proposed Solution for Spring 2016:
- Discuss with team if further work is agreed upon.
- Possibly design a safety landing feature, where the UFO will shut off all wireless communication with the remote controller and automatically land when the battery levels are low.
Multiwii ESC and Receiver Connections:
Overview/Purpose:
- Documentation on how to connect the ESC and receiver to the microcontroller.
Multiwii ESC and Receiver Connections from previous Semester:
- Instructional post on which connectors go into which pins of the microcontroller.
Mishaps:
Proposed Solution for Spring 2016:
- This post will be used as a guideline when installing our ESC’s and receiver.
PCB Design – Battery Protection Circuit:
Overview/Purpose:
- Instructional video on creating a Battery Protection Circuit to prevent over-discharging.
Battery Protection Circuit from previous Semester:
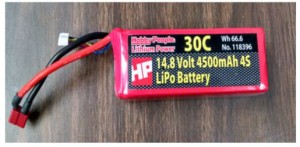
- The LiPo battery in our possession does not have a Protection Circuit.
- Design of a Battery Protection Circuit shall be included in the PCB.
Mishaps:
Proposed Solution for Spring 2016:
- This post will be used as a guideline to include a Battery Protection Circuit in our own PCB.
- Possibly add a feature to safely land at low battery levels to prevent UFO from crash landing when the battery shuts off.
PID Control and Tuning:
Overview/Purpose:
- Informative Post on PID Control
PID Control and Tuning from previous Semester:
- Detailed instructions on how to PID tune.
- Links included for PID controller download for Arduino IDE.
- Instructions on altering files to be compatible with UFO.
Mishaps:
Proposed Solution for Spring 2016:
- similar set up will be used for PID tuning.
Trade-Off Study: Battery
Overview/Purpose:
- Comparison of different types of batteries to determine best battery for UFO.
Battery Trade-Offs from previous Semester:
- Used same trade-off study from Spring 2014
- Turnigy nano-tech A-Spec G2 met all required specifications.
Mishaps:
Proposed Solution for Spring 2016:
- Create updated chart with more options.
Quadcopter PID Control:
Overview/Purpose:
- Informative post on PID control.
PID Control from previous Semester:
- A PID controller measures the error between the actual and desired values.
- It then makes corrections to the system to reduce the error and make the actual value as close to the desired value as possible.
- The speed and efficiency of the correction is heavily dependant upon the P, I, and D coefficients of the controller.
- Lists of pro and cons of each coefficient is shown in the post.
Mishaps:
Proposed Solution for Spring 2016:
- very informative post on PID control.
- will use for future reference.
Trade-Off Study: Motor Battery Selection
Overview/Purpose:
- Comparison of different types of batteries to determine best battery for UFO.
Battery Trade-Offs from previous Semester:
- Study was done comparing cost, weight, capacity, max discharge rate, max current draw, max flight time, and capacity/weight ratio.
- MaxAmps LiPo was chosen due to the high capacity and cost advantage, as well as the higher current draw than any other options.
Mishaps:
Proposed Solution for Spring 2016:
- Create updated chart with more options.
Final Controls Update:
Overview/Purpose:
- Detailed results of Fall 2013 quadcopter. Recommendations for future UFO project members.
Final Controls Update from previous Semester:
- future recommendations:
- tune PID more accurately
- prevent yaw rotation
- tinyduino is hard, use a different microcontroller if possible
- EDFs provide more thrust than anticipated, so the UFO can support a heavier microcontroller if needed
- breakout board on tinyduino is 1mm, extremely hard to work with.
Mishaps:
- PID needs better tuning to improve stabilization during hover and turn operations.
- yaw rotation out of control. design something to counter it.
- tinyduino is not easy to work with.
Proposed Solution for Spring 2016:
- research more on PID tuning.
- research angle tilt of fans to counter yaw rotation.
- new microcontroller if budget allows.
Experiment: Prototype Test
Overview/Purpose:
- Conducted tests to determine whether quadcopter meets requirements and whether updates need to be made to the design.
Prototype Test from previous Semester:
- 3 Tests: Rotation, Lift, Tilt
- Test A(Rotation) results: it is noted that the yaw rotation is caused by an increase in acceleration. if the velocity of the fans is slowly increased the rotation will be reduced.
- Test B(Lift) results: around 36% applied thrust is required to lift the UFO and maintain hover.
- Test C(Tilt) results: tilting the UFO succeeded but the tilt may not be enough for it to turn in the desired direction.
- Arechiga, Danny. “YAW Control.” Arxterra. N.p., 12 Dec. 2015. Web. 12 Feb. 2016. <https://www.arxterra.com/yaw-control/>.
- Arechiga, Danny. “PID Tuning.” Arxterra. N.p., 11 Dec. 2015. Web. 12 Feb. 2016. <https://www.arxterra.com/pid-tuning/>.
- Arechiga, Danny. “Analog Noise Cancellation.” Arxterra. N.p., 2 Dec. 2015. Web. 12 Feb. 2016. <https://www.arxterra.com/analog-noise-cancellation/>.
- Arechiga, Danny. “Battery Discharge Characteristics and Voltage Monitor.”Arxterra. N.p., 16 Dec. 2015. Web. 12 Feb. 2016. <https://www.arxterra.com/battery-discharge-characteristics-and-voltage-monitor/>.
- Arechiga, Danny. “Multiwii ESC and Receiver Connections.” Arxterra. N.p., 26 Oct. 2015. Web. 12 Feb. 2016. <https://www.arxterra.com/multiwii-esc-and-receiver-connections/>.
- Hatori, Ayaka. “PCB Design – Battery Protection Circuit.” Arxterra. N.p., 13 May 2015. Web. 12 Feb. 2016. <https://www.arxterra.com/pcb-design-battery-protection-circuit/>.
- Ceballos, Salvador. “PID Control and Tuning.” Arxterra. N.p., 22 Apr. 2015. Web. 12 Feb. 2016. <https://www.arxterra.com/pid-control-and-tuning/>.
- Jackson, Anthony. “Battery.” Arxterra. N.p., 14 Dec. 2014. Web. 12 Feb. 2016. <https://www.arxterra.com/battery/>.
- Mohideen, Shamir. “Quad-copter PID Control.” Arxterra. N.p., 13 Dec. 2014. Web. 12 Feb. 2016. <https://www.arxterra.com/quad-copter-pid-control/>.
- Rice, Jake. “Motor Battery Selection.” Arxterra. N.p., 16 Mar. 2014. Web. 12 Feb. 2016. <https://www.arxterra.com/motor-battery-selection/>.
- Walth, Carlen. “Final Controls Update.” Arxterra. N.p., 18 Dec. 2013. Web. 12 Feb. 2016. <https://www.arxterra.com/final-controls-update/>.
- Walth, Carlen. “Prototype Testing Results.” Arxterra. N.p., 21 Dec. 2013. Web. 12 Feb. 2016. <https://www.arxterra.com/prototype-testing-results/>.
5. Creativity Assignment:
Random Nouns Generated:
- Mattress
- Helium
- Shell
- Bacon
- Spring
- Ball
- Fish
- Vehicle
- Moon
- Wing
- Device
- Mint
- Kite
- Wheel
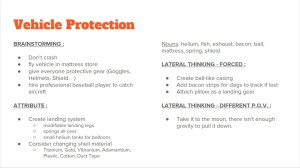
How do we protect vehicle from crash landing damage/ hurting people?
- Brainstorm
- don’t crash
- fly vehicle in mattress store
- Slow down vehicle as it reaches certain height or battery voltage lowers
- Give everyone helmets, protective vests, bubble wrap, safety goggles…
- Hire professional baseball player to catch aircraft
- Attribute
- Create landing system
- Add springs all over (the simpsons maggie)
- modifiable landing legs
- Small helium tanks to inflate balloons
- Shell Material:
- Titanium
- Gold
- Vibranium (Captain America)
- Adamantium (Wolverine)
- Plastic
- Cotton
- Duct Tape
- Lateral thinking
- Forced
- Random Noun Generator:
- Helium, Fish, Exhaust, Bacon, Dodge ball, Mattress, Spring, Shield
- Create new casing to resemble a beach ball/ Dodge ball
- Fish tail to control the vehicle.
- Add Bacon strips for dogs (and hungry bacon lovers )to find in case we lose the vehicle
- Use turtle shell, for battery protection
- Attach Pillow as a landing gear
- Different Point of View:
- Send it to the moon, there isn’t as much gravity like earth to pull it down.
What can we do to control the Yaw rotation?
- Brainstorm
- tilt fans
- alternate clockwise and counterclockwise fans
- use reaction wheels
- add wings
- Have a volunteer counter rotation by hand
- Attribute
- heavier shell might be less prone to rotation
- might reduce yaw rotation
- Lateral thinking
- Forced
- Use coke and mentos propulsion
- Diff POV
- Build it in the future, use anti gravity propulsion
- Fly the device on it’s side; now the yaw problem is a pitch problem
- Use AI to stabilize itself
- Build it in the past with no electronics, attach frame to a kite

